
Wild Garlic and Ginger Butter
 © 2022 | http://angiesrecipes.blogspot.com
 |
 |
Wild Garlic in the Woods
 © 2022 | http://angiesrecipes.blogspot.com
 © 2022 | http://angiesrecipes.blogspot.com
Wild garlic, aka ramsons, or ramps, or bear’s garlic (Bärlauch), is expensive to buy (100 g=2 Euro) but free to forage. Just make sure you’re picking the right thing: the leaves of wild garlic are easily mistaken for lily of the valley (Maiglöckchen), and also autumn crocuses (Herbstzeitlose). They are both poisonous and neither of these two smell or taste like garlic or chives. The best way to identify wild garlic is by smell. Crush a leaf in your hand and the aroma should smell strongly of garlic.
Wild garlic is used traditionally throughout Europe as a spring tonic due to its blood-purifying properties, similarly to bulb garlic, it is also thought to lower cholesterol and blood-pressure, which in turn helps to reduce the risk of diseases such as heart attack or stroke.
Picked wild garlic leaves will keep for 3-4 days in dark and cook place (a plastic bag in the salad draw of your fridge is ideal), but the flowers are best used on the day they are picked. The whole plant of this punchy springtime herb is edible and can be used in pestos, garlic butter, soups, tarts, marinades and more. This wild garlic flavoured butter is extremely versatile – use to spread onto a sourdough bread, to make garlic pull-apart bread or gnocchi, to toss with pasta or melted over a griddled steak or baked potato.
Wild Garlic and Ginger Butter
inspired by this recipe on Küchengötter
|
- Peel and finely chop the ginger, preferably press it through a garlic press. Wash the wild garlic thoroughly, then spin dry them using a salad spinner. Finely chop the dried wild garlic. Peel the garlic and press through a garlic press.
- Place the softened butter in a bowl with salt, then juice the lime and add to the butter. Add in ginger, wild garlic and garlic.
- Mix all the ingredients with a hand mixer until combined. The flavoured butter is now ready to use if you're cooking with it straight away.
- Or spoon out the soft butter into a log at the bottom quarter of a cling film and wrap very tightly round the butter, then roll up the rest of the cling film around it. Roll the wrapped butter across the table until you have a smooth log shape. Tie a knot at each end, ensuring you have squeezed out all the air. Chill for at least one hour or until needed. You can freeze the log for a month and cut off slices as needed.

© 2022 | http://angiesrecipes.blogspot.com

© 2022 | http://angiesrecipes.blogspot.com

© 2022 | http://angiesrecipes.blogspot.com
The Difference Between Stovetop and Electric Pressure Cooker

© 2021 | http://angiesrecipes.blogspot.com
I, for one, am thrilled that pressure cookers are making a comeback. I recall my mom using it right on top of the stove when I was young, and I had assumed they were an outdated tool. It turns out that not only do they have tons of uses today, but they have been given a modern upgrade.
The traditional cooker is still around, but it has been all but pushed aside in favor of electric options. Is that because these newer cookers do a better job? Are they faster? Or is it just that they are super trendy? Let’s dig in to find out the different between stovetop and electric pressure cookers.
Heat Adjustments: When using an electric pressure cooker, I can easily set it and let the machine do the heavy lifting when it comes to heat settings. It just requires me to choose setting, and then it takes care of adjusting to the correct heat. I can even set it and leave the room while it does the hard work. The stovetop variety does require the home cook to make adjustments manually to ensure that I don’t lose pressure. There is a learning curve involved in getting it just right.
Power: Stovetop models will reach a higher pressure more quickly than their electronic counterpart.
Durability: It is likely that my mom still has that stovetop unit I mentioned because that thing was a champ. They are very sturdy and can last for decades. The electric models may contain plastic components that don’t have a very long life. The aluminum coating may also get scratched by utensils. Though they are newer to the market, some models last only a few years.
Timer: Traditionally, the stovetop variety of cooker does not have a timer included. There are newer models on the market, but most users will need to use a kitchen timer to keep track of cook time. For electronic models, the timing mechanism is included to keep track of cook time.
Size: Electric models are usually stored on a countertop due to their size. The versions that are used right on top of the stove are less bulky and can easily fit in the cupboard with the rest of the pots and pans.
Which Type is Best?
Deciding which type of cooker is right for you depend on your needs. If you are looking for a durable unit that is high in power and can quickly pressurize, then a stovetop model makes sense. They are also good for those who want to keep an eye on the entire cooking process. Kuhn Rikon Duromatic and Zavor DUO models are great options.
They are durable and offer a variety of sizes. For those who are looking for a cooker that adjusts to the appropriate heat and pressurizes without much intervention, then an electric model is a great option.
Those looking for an electric option, AllCookwareFind recommend the Instant Pot Duo Nova or Cuisinart CPC-600. These both allow sautéing and steaming in addition to pressure cooking. They boast built-in timers, are easy to use, and will be a nice addition to any countertop.

© 2021 | http://angiesrecipes.blogspot.com

© 2021 | http://angiesrecipes.blogspot.com
Homemade Harvest Herb Salt
 http://schneiderchen.de | © 2018 | http://angiesrecipes.blogspot.com
 |
 |
http://schneiderchen.de | © 2018 | http://angiesrecipes.blogspot.com
Preserve your herb harvest by making flavourful herb salt. I used Himalayan pink salt, and a mix of herbs of sage, rosemary, thyme, parsley and oregano, but you can use whatever combos you love with different salts. It's easily customizable and makes great gifts.
|
- Wash the herbs and remove coarse stems and any discolored leaves. Dry thoroughly.
- Place the herbs, garlic and salt in a food processor and pulse until you have a coarse grind. Don't over do it, you don't want a paste or puree. You can use a sharp knife to chop everything until you have a coarse mixture.
- The salt will be slightly wet at this point. Spread the salt on a baking tray and let it dry for a couple of hours. You can also preheat the oven to 120F/50C. Turn it off, then place in the baking tray and let it sit until it is dry to the touch. Store the herb salt in a glass jar and use as you wish. The juicy
vine ripened tomatoes
©angiesrecipes taste particularly sweet with this herb salt.


http://schneiderchen.de | © 2018 | http://angiesrecipes.blogspot.com

http://schneiderchen.de | © 2018 | http://angiesrecipes.blogspot.com
Quick and Easy Garnishes

How many times have you eaten out at a restaurant and found the edge of serving plates garnished with a flower pattern of veggie, a fan shape of fruit slices, and even a cute rabbit of quail egg, a heart of cherry tomato surrounding the food? Wouldn't those garnishes make your dining experience more pleasant and enjoyable? I have a couple of quick easy garnishes to share, hoping they would add excitement to your family banquet, casual brunch with friends, or just dinner for one. If you want to get fancy with the designs, then a book about garnishing would be more practical.
Tomato or Apple Rose

- Starting at the stem end cut round an apple or a tomato and keep the peel unbroken. Make the strip of apple or tomato skin narrower and narrower while you continue cutting.
- Start curling the skin at the narrow end towards the wide end. Turn upside down, adjust the roll if necessary to resemble a flower and set on a serving plate.
Tomato Heart and Rabbit

- Holding a sharp knife at a 45-degree angle slice off 1/3 of a cherry tomato. Place the 2/3-part, cutting side down, on a cutting board. Slice it into even two halves and put them together to form a heart.
- Slice 1/4 of a cherry tomato horizontally with a sharp knife. To make a little rabbit ear, we need to cut a V-notch with scissors at either side of this horizontal slice. Put the cutting side of the 3/4-part as a base, and cut a slit on the top to fit in the rabbit ear.

Carrot Flower and Cucumber Loop

- Peel carrot and place on cutting board. Cut off ends and discard. Cut out a thin, shallow lengthwise wedge from side of carrot. Lift out wedge with tip of knife. Give carrot a quarter turn and cut out another wedge. Repeat, turning and cutting two more times. Cut into 1/4-inch thick slices. Sprinkle chopped olives or caviar onto center of each carrot flower. Use a thin strips of green onion for stems and garnish as you like.
- Slice the cucumber open lengthwise and cut unpeeled cucumbers at angle into lengths about 3 inches long. Cut 5 thin slices along the length, leaving slices connected at one end. Curl the second and fourth slices towards the base to form an open loop.

I am sending this to Innovative In-Laws who hosts the event "Garnish the Dish" .
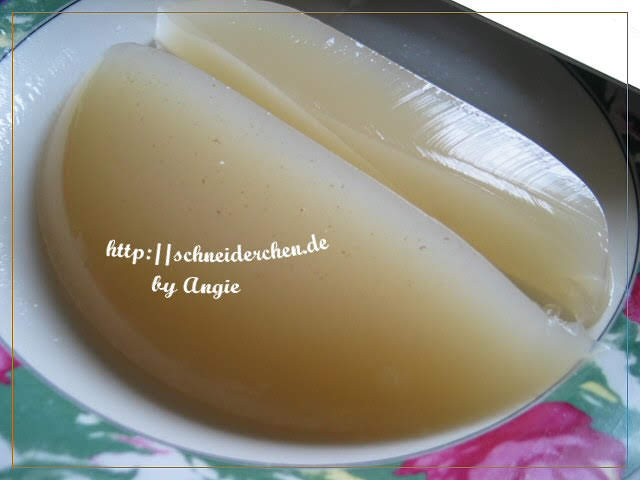
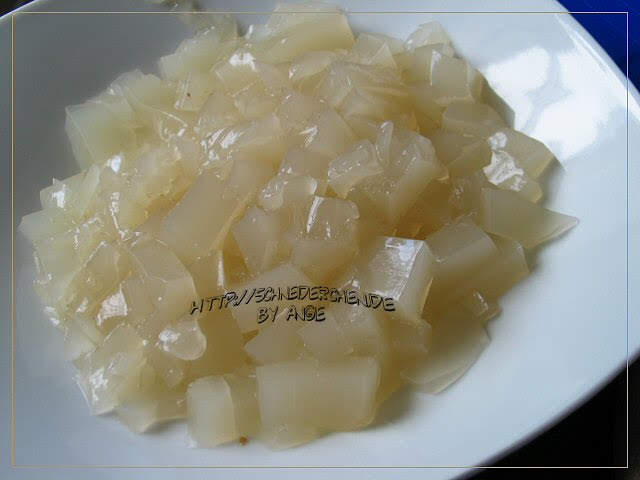
Chicken Broth Jelly
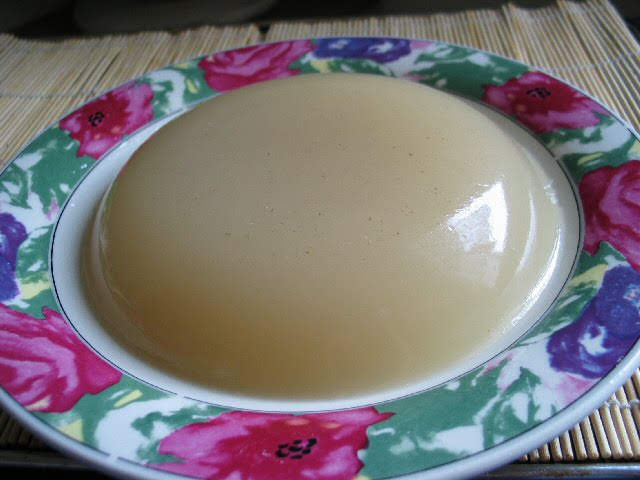
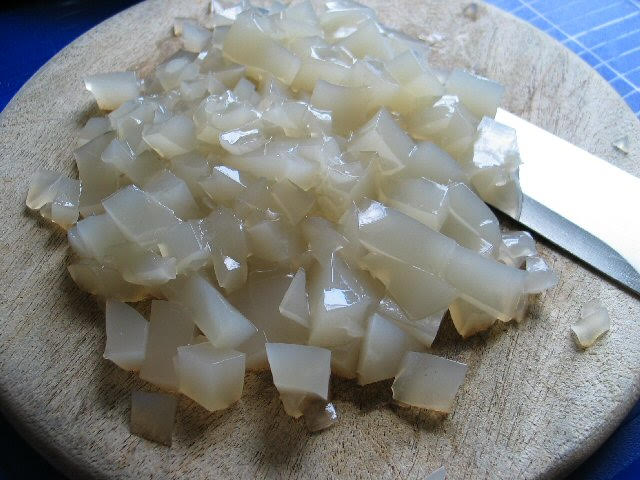
Chicken broth contains the broken down material from bones and tendons. When the broth is cooled, it congeals due to the presence of gelatin.
|
|
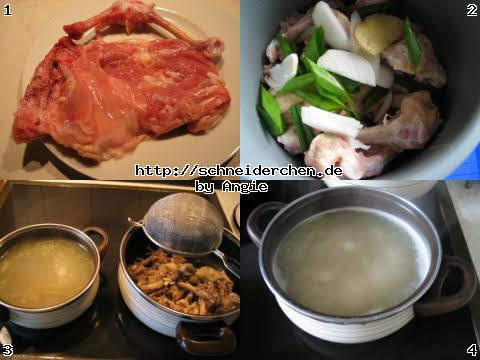
- Wash the chicken bones and skin thoroughly and add them into a pot of boiling water. Boil for 2 or 3 minutes and then turn off the heat. Drain and rinse the bones thoroughly under the tape water.
- Fill a pot with water with ginger, spring onions, rice wine, vinegar, chicken bones and skin. Bring to a boil. Simmer over low heat until liquid has reduced by half, about 2 hours. Strain stock into a bowl. Discard solids. Season the stock with salt and pepper. Allow the liquid to cool down and set to a jelly. It’s ready for use. The broth can be kept in a fridge for up to 3 days or frozen for at least 6 months.
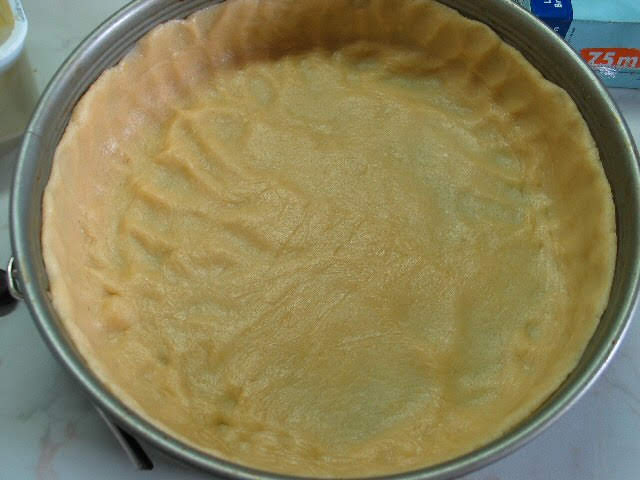
Sweet Crust Pastry (Pâte Sucrée)
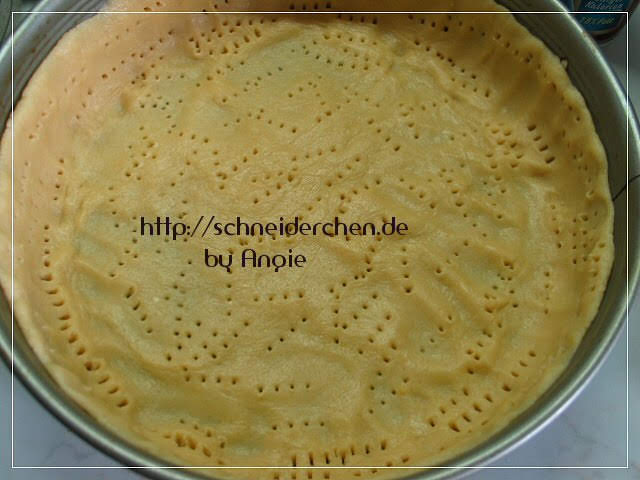
Crumble, cookie like sweet pastry dough is mainly made of sugar, egg (or just yolk), and flour. Sweet Pastry Crust (Pâte Sucrée in French) is a sweet, crumble, cookie like pastry dough made of sugar, egg (or just yolks), and flour. It’s a kind of shortcrust pastries. Low-fat butter or margarine should be avoided in making pastry because they usually have high water contents.
|
- Preheat the oven to 200C/400F. Sieve the flour and baking powder into a mixing bowl. Add sugar, salt, egg and butter or margarine. Mix first at slow speed with a hand mixer, then increase the speed and mix until a soft but not sticky pastry is formed.
- Cover tightly with cling film and allow to rest in a fridge for 30 minutes before use. Roll out to the required thickness. The recipe is good enough for a 26-28cm springform
. With fork, prick dough to prevent puffing and shrinking during baking. Bake in the middle rack of the preheated oven for 15-20 minutes until golden. The dough can be prepared the day before you plan to use it and should keep in the fridge for up to three days if needed.


How to Prepare Chinese Sweet And Sour Sauce
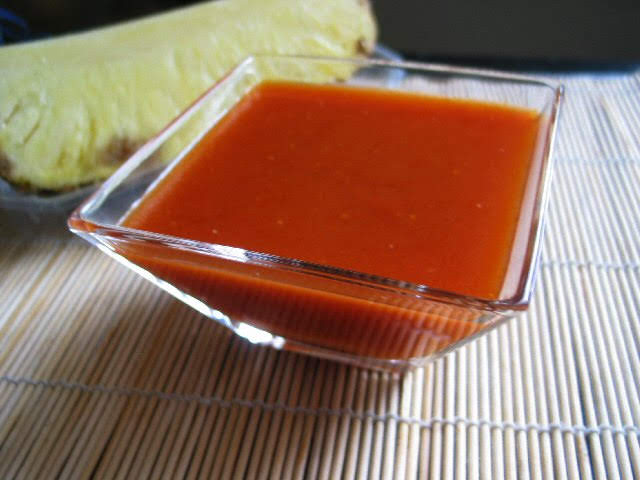
Typical Chinese dishes incorporating sweet and sour sauce are sweet and sour pork tenderloin, spareribs, shrimp and chicken.
| Seasoning | |
|---|---|
|
|

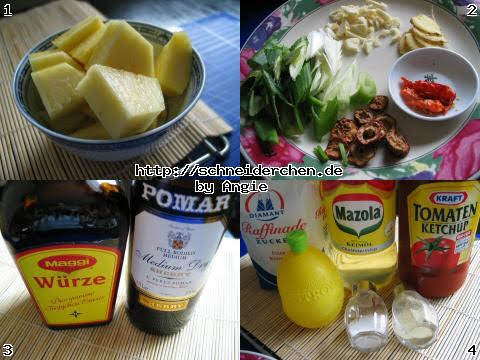
- Use a serrated knife to cut off the leave stem of the pineapple. Quarter the pineapple lengthwise and remove the core. Cut the pineapple into the small chunks. Cut the spring onion and chillies into smaller pieces. Set a skillet over medium heat until hot and add in oil. When hot, stir in ginger, garlic and white parts of spring onion until aromatic. Add in the green parts of the spring onion, pineapples, dried hawthorns and the seasoning.
- Adjust the fire to high and bring all the ingredients to a boil. Reduce the heat to low and simmer for 20 minutes. Remove the vegetables and pineapples, adjust the heat to high and reboil the sauce. Thicken the sauce with 1 tablespoon of starch solution. When cool, store in a covered container in the fridge.


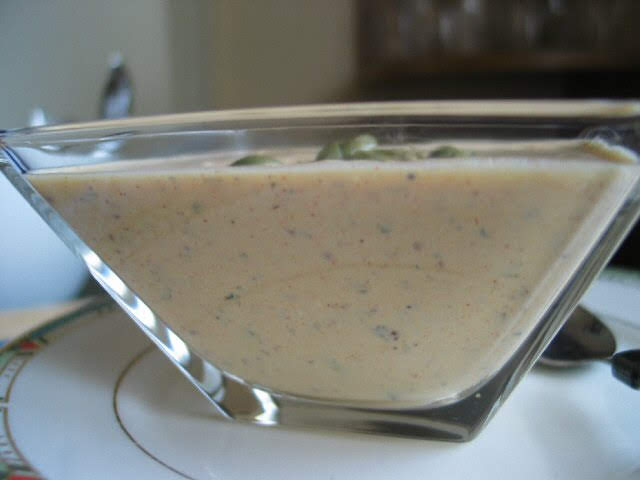
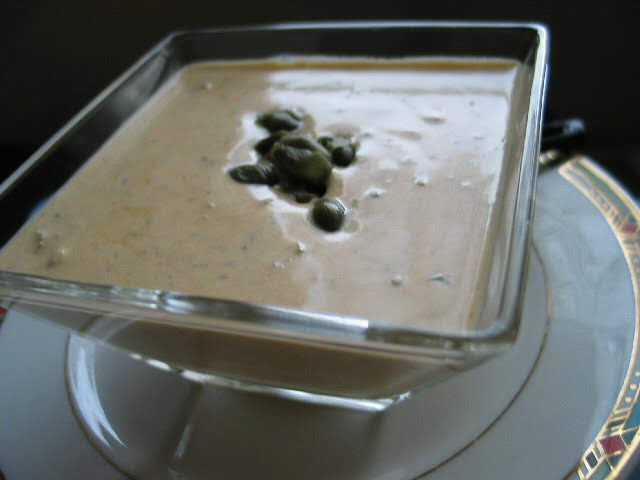
Remoulade Sauce

|
|

- Press hard-boiled egg yolks through a sieve into a mixing bowl. Add in raw egg yolk and beat until incorporated. Slowly beat in half of olive oil until thick and stiff.
- Beat in lemon juice and mustard. Add in the rest of the ingredients. Blend all ingredients and chill. Will keep for several days in an airtight container in the refrigerator. It is often served with seafood dishes, fries, or salad.

How To Cream Butter
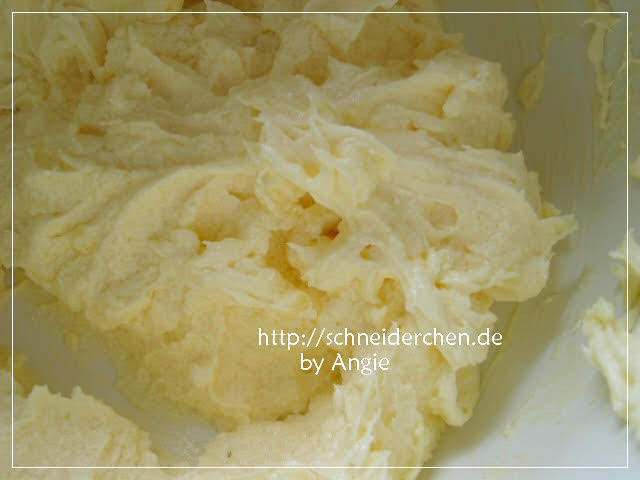
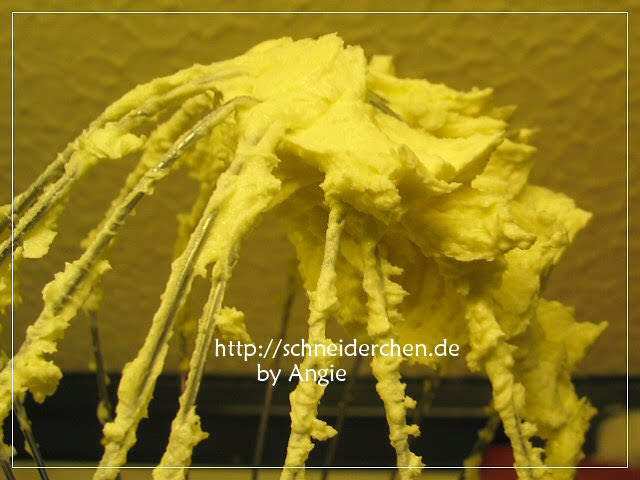
Creaming in baking refers to the technique of beating butter or shortening and caster or icing sugar together until fluffy, lemon white in colour and increased in volume due to the incorporation of tiny air bubbles. These bubbles stay in batter and enlarge the cakes with the help of a certain amount of leaving agents such as baking powder or baking soda. Poorly creamed butter can result in cakes or cookies that are disappointedly coarse and dense. The traditional fat used for creaming is real butter, but vegetable shortening is the most effective to work with. Never melt the fat to soften.
- 110 g Unsalted butter
- 220 g Caster sugar
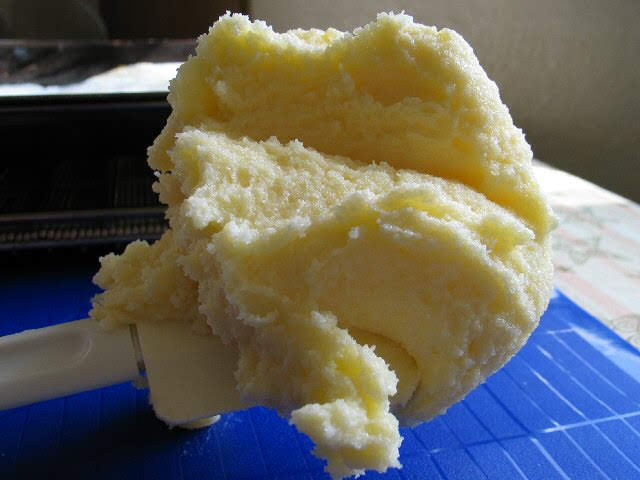
- To cream butter and sugar properly, begin with the butter of right temperature. Butter that is too cold and it is difficult to work with and won’t blend with sugar. Too warm, it won’t held the air bubbles at all. To cream effectively, 18C/65F is the ideal temperature. Measure with a temperature thermometer or lightly press the block of butter with the index finger and it bents slightly, it is ready to be creamed. Make sure your mixing bowl is at room temperature too. I usually dice the butter directly out of the fridge and allow them to sit for 5 minutes to reach the right temperature. Meanwhile I go ahead with other instructions called in the recipes, such as sifting the flour or greasing the baking pan. Another important influencing point is the ratio of butter to sugar quantity. The general ratio for creaming is half as much butter as sugar.
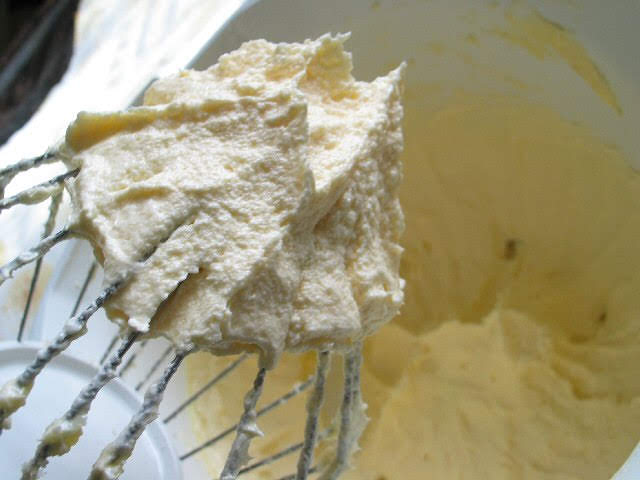
- For a smooth textured cake, fine white sugar (or brown or a combination) will apply in the recipe. When creaming butter by hand, use a wooden spoon as it holds the butter best and keeps it from sliding around the bowl. While it is possible to cream butter and sugar by hand, it is much faster and easier to use an electric mixer. In this step, we add sugar gradually at the side of the bowl while mixing, beating thoroughly after each addition. When using an electric mixer, it is important to start at low speed first to combine all the ingredients, then switch to medium speed to beat sugar and butter until the mixture fluffy and pale. Stop to scrape the bowl down periodically to make sure everything is thoroughly combined, about 5 minutes. If you have patience and time, then add sugar one tablespoon at a time, the whole process should take 8-10 minutes. It is important not to beat any more than absolutely necessary as it will just diminish its strength o hold the air bubbles. Any extracts can be added in this step.
- The creamed mixture is suitable for making creamed cakes or cookies and it should be used immediately because you don't want the butter in the creamed mixture to soften and the beaten air pockets to disappear. After creaming, room-temperature eggs usually will be required to beat in for optimal volume and for a smooth texture because the lecithin in yolks acting as a perfect emulsifier.

Stabilizing Whipped Cream
Creamy whipped cream with a hint of sweetness, it’s perfect for piping and decorating layered cakes, or making mousses or just as an accompaniment to tarts and many other desserts. To create whipped cream, dairy whipping cream is usually sweetened with sugar during beating.
Cream are categorized and sold according to the amount of milkfat or butterfat they contain. Light whipping cream has between 30% and 36% butterfat and heavy whipping cream contains 36%-40% fat, or even 42%. If a cup of cream in the supermarket labeled whipping cream, then most likely means light whipping cream. Both creams can be turned into whipped cream by beating them with air. The fat grobules in the cream then trap the air bubbles, resulting the foam, which is roughly the size of the original cream.
| #30% Butterfat | #32% Butterfat |
 |
 |
| #33% Butterfat | #35% Butterfat |
 |
 |
In Germany whipping cream (Schlagsahne) usually contains 30%-33% fat, if cream has 35% fat content, then it is probably labeled as “Schlagsahne Extra” (33% fat content from Eifel NRW ) or “Teesahne” with maximal 40% butterfat and “Crème Double or Doppelrahm” between 43% and 45% butterfat content. Cream has slightly lower butterfat content, between 25% and 29% are labeled and simply sold as “Sahne”. “Coffee cream or Kaffeesahne” here contains 10-15% fat. In UK, a cream labeled as “Double Cream”, must contain 48% butter fat, and 35% for a whipping cream. “Half Cream” with 12% fat content used only for coffee in UK is correspondent with German “Kaffeesahne”, while a 18% “Single or Light Cream” correspond to American “Half And Half. Ok, enough confusion. All you have to remember is that whipping cream with a fat content of 30% to 36% works best when making whipped cream. The higher the butterfat, the more flavourful and stable cream will be.
|
|
| #Leaf Gelatin | #Soaked In Water |
 |  |
- Cream is easier to whip up when cold. So start by chilling a large, clean mixing bowl (preferably stainless steel bowl which helps keeping cream colder), a beater or whisk, and the cream in the refrigerator overnight or until thoroughly chilled. To make sure they are VERY cold, I put the mixing bowl and beater in the freezer 15 minutes again before start whisking the cream. In summer time, place the bowl in a larger bowl filled with ice water and whip the cream in the coolest place of the room. Turn on the air conditioner if you have one. While the bowl and beater are still in the freeze, prepare the stabilizer.
- Submerge the gelatin sheets in a small bowl filled with cold water until softened, 3-5 minutes, then gently squeeze out excess water. If using granulated gelatin, add 2 tablespoons or just enough of cold water to the gelatin so that the liquid is thoroughly absorbed. Temper the bowl of softened gelatin inside another pan of very hot water, or heat it in a microwave on high for about 20 seconds. Stir the heated mixture until the gelatin is completely dissolved. Remove from heat and cool it to about the body temperature. Do not let the gelatin set.
- Besides gelatin, the starch-based stabilizers, like RUF, Dr. Oetker, or Kuechle, can also be used to help stabilize the whipped cream. They are usually to be found in every supermarkets in Germany.
- Whip cream either by mixer(handheld or stand) or by hand (not recommended though, especially when whipping a lot of cream; if you do, use a balloon whisk). To make life easier, I use a stand mixer with the whisk attachment to whip cream. Fill the well-chilled mixing bowl at least 1/5 full fitted with the well-chilled whisk with nice cold whipping cream, so that air can be incorporated quickly and efficiently with the cream.
- To avoid cream splashing, start it off slowly until the mixture becomes soft and thicker. The cream drops from the whisk when it is lifted. Now it is the right time to add in extract and icing sugar (icing sugar contains cornstarch which helps stabilize the whipped cream) along the sides of the bowl, and continue to beat at medium speed. Slowly add in the dissolved gelatin all at once and beat until the cream holds soft peaks. The volume of well-whipped cream is about doubled. Overbeating will cause it to curdle and become butter.


 |
 |
 |
 |
 |
 |
Easy Methods of Whipping Egg Whites
- Besides having balanced ratio of the cake recipes, techniques of whipping egg whites often determine quality of cakes. It’s unnecessary to beat the egg whites to stiff every time. The consistency of whipping egg whites depends on what kind of cake you are going to bake. Therefore you have to whisk the egg whites in a right way before savouring a piece of tasty cake.
- Use the most fresh eggs in the cake baking. Old egg whites tend to collapse when other ingredients are folded in, and they don't rise well in the oven. Freshness Test: Place an egg in water mixed with a little salt. If the egg is fresh it will sink. The quicker or farther it sinks, the fresher it is. If the egg floats, it has spoiled. Cold eggs are easier to separate than warm eggs. To achieve maximum volume when beating eggs, have them at room temperature, about 17C—22C.
- Make certain that all mixing equipment are absolutely clean, and that inclusive of your hands. The bowl and and beaters should be free of fat particles. Egg whites will not increase to the desired volume if contaminated with any trace of oil. This is also true if any tiny speck of yolk appears in the egg whites. If you happen to have copper bowl in hand, it is ideal for whipping egg whites. A reaction between the copper and whites generates a much more stable foam, with one-third more volume than you get in a standard bowl. If copper is not available, the next best choice is stainless steel. 1/4 teaspoon of cream of tartar for 2 egg whites can be added as a stabilizer, replacing the acidic properties of the copper. Lemon juice or vinegar will work as well. The ratio stays same as cream of tartar calls for the recipe. If possible, plastic and glass bowls should be avoided to use because plastic tends to hold some oil even after thorough cleaning. The naturally slick surface of glassware doesn't give much traction for the egg whites to climb the bowl. Never use aluminum which reacts with the egg whites causing them to turn slightly gray.
- Whether to use a hand-held electric mixer
angiesrecipes or a stand mixer
angiesrecipes really depends on the number of egg whites whisked at one time. I choose using a stand mixer when I have to beat more than 3 egg whites, otherwise, I prefer to whisk egg whites with my hand-held electric mixer. That’s not to say that egg whites cannot achieve their full volume manually beaten. A bulb whisk
angiesrecipes works fine and for sure more wires bring on faster results. Spiral version works easier than the flat one. Start at a slow speed and gradually increase the speed until the egg whites reach their full volume. Operating the mixer at a high speed from the beginning will not allow the egg whites to reach their full volume and will not stabilize because of its grainy and large bubbles. - Some professional pastry chefs suggest adding a pinch of salt with the raw egg whites at the beginning of beating. Because salt not only enhances flavors but also helps to make the whites beat more easily. However, some feel salt decreases the stability of whipped up egg whites and prefer adding it along with other dry ingredients. When you're ready to whip your egg whites, add an acid to them such as cream of tartar, lemon juice or vinegar. Set your mixer on low and start beating. In about 10 seconds you should have frothy and foamy egg whites.
- Sugar not only adds sweetness, it also stabilizes the egg whites and helps producing a more smooth meringues. When whipping egg whites for soft macaroons, use just one part sugar to one part egg white, i.e. beating 1 egg white with 2 tablespoons of sugar. Or use 2 parts sugar, 4 tablespoons, to whip up one part egg white. If less than 2 tablespoons of sugar to whisk one egg white, the foam will not set and the meringue will shrink. Besides weight ratio, timing plays another important roll in whisking egg whites. It is very important to be aware of when you add the sugar to the egg whites. If whisking in 1/4 cup or less of sugar, then add at the beginning. Otherwise, start adding it gradually just before they form soft peaks, when egg whites have been whipped to at least four times their original volume. Sugar, if added too soon, will likely inhibit egg whites from foaming. If too late, sugar not completely dissolved, and you most likely end up having dull and over-whipped egg whites. Always add sugar in a stream, slowly at the side of the bowl while the whites are being whipped. Avoid dumping it in the center, unless you want to experience how beaten egg whites deflate.


蛋白/Egg White/Albumen/Poggle/Glair/Glaire can go through 4 stages ( 5, if inclusive of the stage before beaten-up) when beaten depending upon the end result needed. Do NOT stop the mixer in between.
#Foamy Fluffy: Large bubbles, very loose with a cloudy, yellowish liquid developing into bubbles.
#Soft Peak: Bubbles have tightened into a white foam with a soft ribbon that folds back into itself. You can pull the whites into a "2-3 centimeters peak" but they won't hold the shape.
#Firm Peaks: Glossy, firm and smooth like fresh heavy cream. You can pull whites into a peak that will curl but not stand.
#Stiff Peaks: Glossy and very stiff. Best for baking chiffon cakes.
#Over Beaten: If egg whites are beaten to dry and dull, they are over-beaten. Watch carefully, because egg whites can go from stiff to dry and over-beaten in as little as 30 seconds.


Kitchen Utensils, Ingredients, Publications
| Ingredient Items | My Publications | Cooking Tools | ||||||
|
|
|


