Featured Recipe

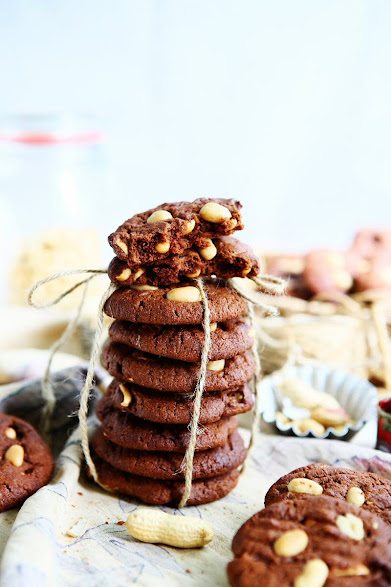
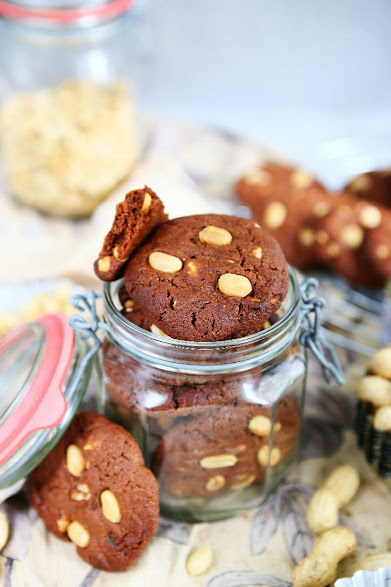
Roasted Peanut, Rosemary and Tomato Cookies
 © 2021 | http://angiesrecipes.blogspot.com
 |
 |
 © 2021 | http://angiesrecipes.blogspot.com
 © 2021 | http://angiesrecipes.blogspot.com
These peanut cookies have a crazy secret ingredien that helps intensify the flavour --you’ll never guess the ingredient. No, it's not mashed banana. No, it's not quinoa. It's tomato paste. It might sound gross, but these cookies are chunky, nutty, chewy and taste amazing. My husband had 3 at one go and still had no idea that there's tomato paste in it.
I actually found this recipe on GoodFood, but tweaked the original recipe slightly and used a blend of white spelt flour and light rye flour instead of plain flour. A tip from my favourite baker Dan Lepard: If you want to test the flavours before committing to a whole batch, you can halve the recipe – just beat the egg and weigh to divide it.
|
- Combine together the white spelt flour, light rye flour, baking powder and chopped rosemary in a bowl.
- Put the softened butter, peanut butter, tomato paste, cocoa powder and coconut sugar in a mixing bowl and beat until smooth. Beat in the egg.
- Add in the flour mixture and mix evenly to a soft dough. Mix in the roasted salted peanuts then spoon into 40 gram balls onto a tray, spaced five centimetres apart. You will have 21 cookies.
- With a fork dipped in water, press the dough balls out flat to about peanut thickness. Sprinkle a few extra peanuts on top of each to decorate. Bake for 15 minutes then transfer to a wire rack to cool completely.

© 2021 | http://angiesrecipes.blogspot.com
 |
 |

© 2021 | http://angiesrecipes.blogspot.com
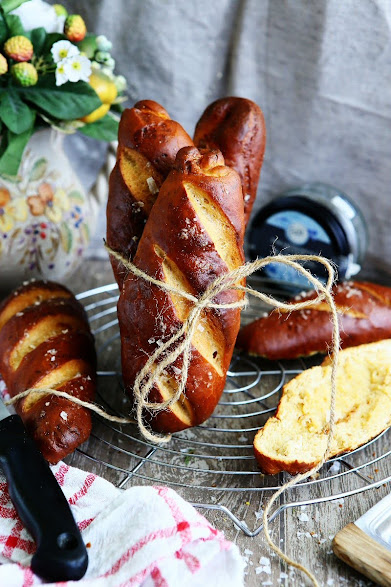
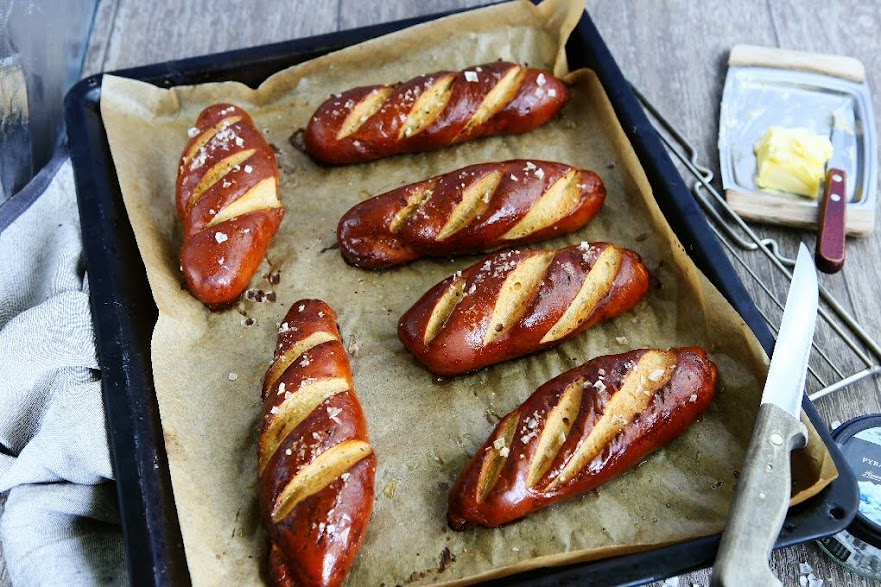
Laugenstangen Pretzel Sticks with Barley Malt Extract
 © 2021 | http://angiesrecipes.blogspot.com
 |
 |
 © 2021 | http://angiesrecipes.blogspot.com

© 2021 | http://angiesrecipes.blogspot.com
These pretzel breadsticks are warm, crusty with a satisfyingly chewy, soft center, just as traditional knotty pretzels, but easier to make and enjoy. Best served hot from the oven with cheese sauce or mustard if desired. We love it with extra butter.
The dough of soft pretzel is a rather simple yeast dough that can be made in an hour. The fun and tricky part is to dip the pretzels in a lye bath (In German this mixture is called Natronlauge) before baking, which gives the pretzels their typical caramel aroma, unique deep brown yet shiny colour and chewy texture. For a crunchy and aromatic crust, just like the one you usually find in the bakeries in Germany, you will have to use Natriumhydroxid (NaOH) instead of regular baking soda (NaHCO3). Natriumhydroxid (NaOH), also known as lye or caustic soda, can be dangerous if misused. So do wear eye protection and rubber gloves if you want to make lye solution for the pretzels. One much easier and safer solution is to use baked baking soda. Simply place baking soda on aluminum lined baking tray and bake for an hour at 120C/245F. When baking soda/sodium hydrogen carbonate/NaHCO3 is heated, it becomes the more concentrated sodium carbonate/soda/Na2CO3, which ensures a darker lye colour when dissolved in water, and better taste than baking soda could.
|
|
- In the bowl of your mixer, add in warm water and milk. Crumble in the fresh yeast and let stand until foamy, about 5 minutes. Add in barley malt extract, melted butter, sea salt and flour. Mix on slow speed until the mixture just roughly come together, about 5 minutes. Increase the speed and knead until the dough has become smooth and elastic, 4-6 minutes. Turn out the dough on a work surface and shape into a round. Return the dough to the bowl and cover with a clean kitchen towel. Let rise in a warm place until doubled, about 30-40 minutes.
- Preheat the oven to 120C/245F. Place baking soda on aluminum foil-lined baking tray and bake for an hour.
- Punch dough down and divide into 6 even portions. Press one piece of dough into a rough rectangle and roll into a 20cm log. Pinch ends and center seam well to seal. Place it, seam side down, on a baking tray lined with permanent baking foil or parchment paper. Repeat with the rest. Cover the dough and proof until puffed, about 30 minutes.
- Place 1 liter water in a large skillet and bring it to a simmer. Turn the heat off and add in hot baking soda. Stir until dissolved.
- Preheat the oven to 220C/430F. Carefully transfer 1 pretzel stick at a time to the baking soda water and let soak for 5-7 seconds, then return them to the baking tray.
- Sprinkle with coarse salt. Cut 3 diagonal slashes across the top with a sharp knife or a razor blade. Bake for 20 to 25 minutes, until pretzels are toasty brown and crispy.

© 2021 | http://angiesrecipes.blogspot.com
© 2021 | http://angiesrecipes.blogspot.com

© 2021 | http://angiesrecipes.blogspot.com
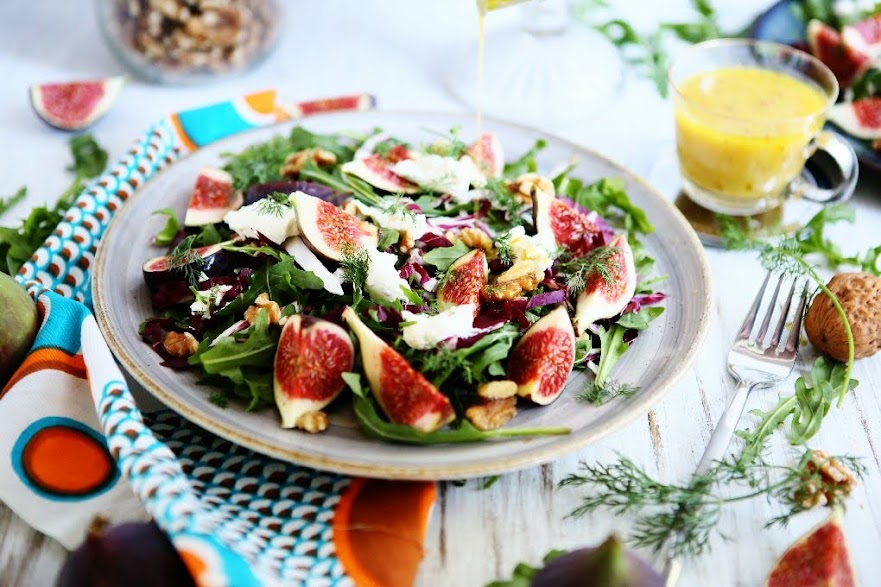
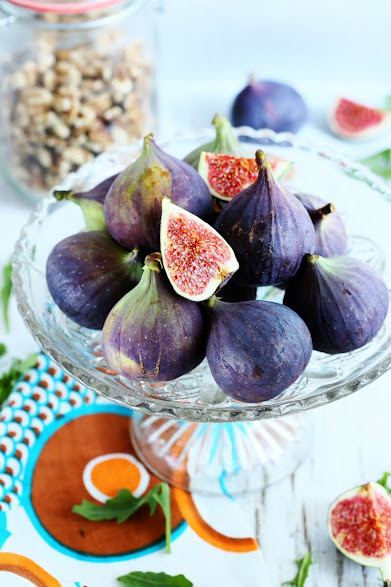
Radicchio Arugula Salad with Figs, Walnuts and Fresh Goat Cheese
 © 2021 | http://angiesrecipes.blogspot.com
 |
 |
 © 2021 | http://angiesrecipes.blogspot.com
 © 2021 | http://angiesrecipes.blogspot.com
This simple bittersweet Fall salad with arugula, radicchio, fresh figs and walnuts is a lovely light starter or side dish, and surely will liven up any meal. The honey vinaigrette takes a few minutes to make and very versatile. It delivers lots of wonderful flavour, but won't overpower the salad. The recipe is a great base for other combinations of oil (avocado oil), vinegar (red wine or apple cider vinegar), and syrups (maple or date syrup). You can either use the dressing immediately, or you can make it a couple of days in advance of serving.
| Salad | Honey Vinaigrette |
|---|---|
|
|
- Heat walnuts in a dry, heavy skillet over medium heat for 3-5 minutes and smell toasted, stirring constantly to ensure even toasting until the nuts turn golden brown. Remove to a plate to cool.
- Combine all ingredients for the dressing in a clean jar. Cover with lid, and shake until fully blended. Chill until ready to use.
- Place arugula, radicchio, and fig wedges in a large salad bowl. Add in 1/3 of the salad dressing and gently toss them together. Divide it into two serving plates. Top with fresh goat cheese and chopped dill. Crumble the toasted walnuts over. Serve it with the rest of the vinaigrette.
© 2021 | http://angiesrecipes.blogspot.com

© 2021 | http://angiesrecipes.blogspot.com
 |
 |

© 2021 | http://angiesrecipes.blogspot.com
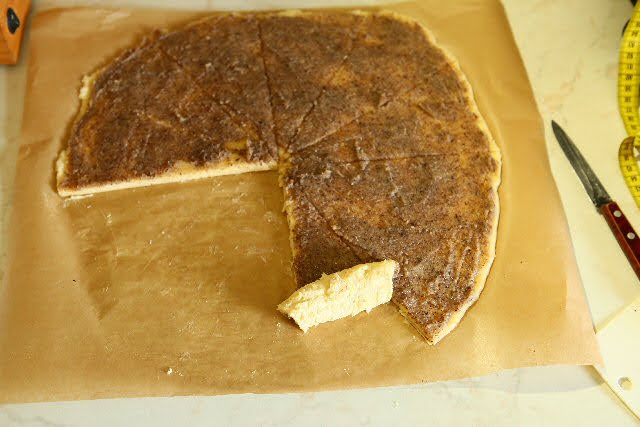
Haselnusshörnchen Hazelnut Crescents with Spelt and Potato
 © 2021 | http://angiesrecipes.blogspot.com
 |
 |
 © 2021 | http://angiesrecipes.blogspot.com
This German-style nut pastry (Haselnusshörnchen) can be found in almost every bakery in Germany. It's very easy to make this at home and the result is just as delicious. You can use either hazelnut or almond, or a combination of two. They are fantastic to serve at the breakfast or in the afternoon with a pot of freshly brewed coffee. I have found the recipe in a local weekly magazine (Neue Post) and just tweaked a bit based on our taste and pantry stock.
| Dough | Filling |
|---|---|
|
|
 |
 |
 |
 |
 |
 |
- Cover the potatoes with water in a saucepan. Bring the water to a boil. Reduce heat to medium low. Cover the pot with a lid and let simmer until fork-tender, about 25 minutes. Drain potatoes and cool to room-temperature. Chill the potatoes overnight. Peel and weigh 250 grams for the recipe.
- Whisk together the spelt flour and baking powder together. Use a potato press to press the potato into the flour mixture.
- Beat butter and sugar until light and fluffy. Beat in eggs, one by one, until combined. Add in flour-potato mixture. Mix until you have a firm and smooth dough. Cover and chill for 30 minutes.
- Mix ground hazelnuts, coconut sugar, coconut milk and vanilla together until you have a thick paste. Preheat oven to 200C/400F. Grease and line two baking trays with baking paper. Roll out the dough into a 40cm circle. Spread the prepared hazelnut paste evenly on the circle. Cut the circle into 12 triangles/wedges. Roll up each triangle from the wide end to form a crescent.
- Place them on the prepared baking trays. Bake in the middle of hot oven for about 30 minutes until lightly golden brown. Dust with icing sugar and serve.

© 2021 | http://angiesrecipes.blogspot.com
 |
 |

© 2021 | http://angiesrecipes.blogspot.com
Easy Plum Tart
 © 2021 | http://angiesrecipes.blogspot.com
 |
 |
 © 2021 | http://angiesrecipes.blogspot.com
 © 2021 | http://angiesrecipes.blogspot.com
This party-worthy tart is a simple way to showcase the seasonal plums. You can easily substitute sliced apples or pears for the plums with great results. I used a basic sweet shortcrust, but you can definitely use store bought one. Chill your crust for at least 30 minutes. One of the reasons that fruit tarts have a soggy bottom is from the moisture of the fruit. The most effective way to prevent soggy crust is to blind bake the crust before filling with fruit. Another way to prevent the pastry crust from getting soggy is to sprinkle ground almonds (or breadcrumbs/graham cracker crumbs/crushed cornflakes, etc.) into the crust bottom, which helps soak up the juice released from the fruit during the baking. Slice the plums into even thin slices and try to keep the slices together so you can arrange them nicely into the crust without making a mess.
| Sweet Shortcrust | Filling |
|---|---|
|
|
- Sift spelt flours into a large bowl and stir in vanilla sugar and a pinch of salt. Cut in butter and lard. Rub together with your fingertips until moist clumps form. Press dough onto bottom and up sides of a 24cm-26cm tart pan with removable bottom. Prick the crust all over with a fork. Cover and chill for 1 hour.
- Preheat the oven 190C/375F. Line pastry with baking paper and fill with pastry weights or beans. Bake for 10 minutes. Remove paper and weights. Bake for a further 8-10 minutes or until light golden. (This is called blind baking the crust, which is the most effective way to prevent soggy crust. If you are in a hurry, just sprinkle ground almond or breadcrumbs onto the crust. This too helps soak up the juice released from the fruit during the baking and keep the crust from getting soggy. )
- Remove the crust from the oven and sprinkle the ground almond onto the crust. Arrange the plum slices in clusters, alternating between horizontal and vertical. There’s no need to be too fussy – as long as they fit snugly next to each other, it will be just fine.
- Drizzle honey or maple syrup if using, thyme leaves, and dot with cubed butter. Bake for 30 minutes until the pastry edges are golden brown and the fruit is tender. Garnish with raw pistachios. Cool completely before slicing. Enjoy with vanilla ice cream or whipped cream.

© 2021 | http://angiesrecipes.blogspot.com
 |
 |

© 2021 | http://angiesrecipes.blogspot.com

© 2021 | http://angiesrecipes.blogspot.com