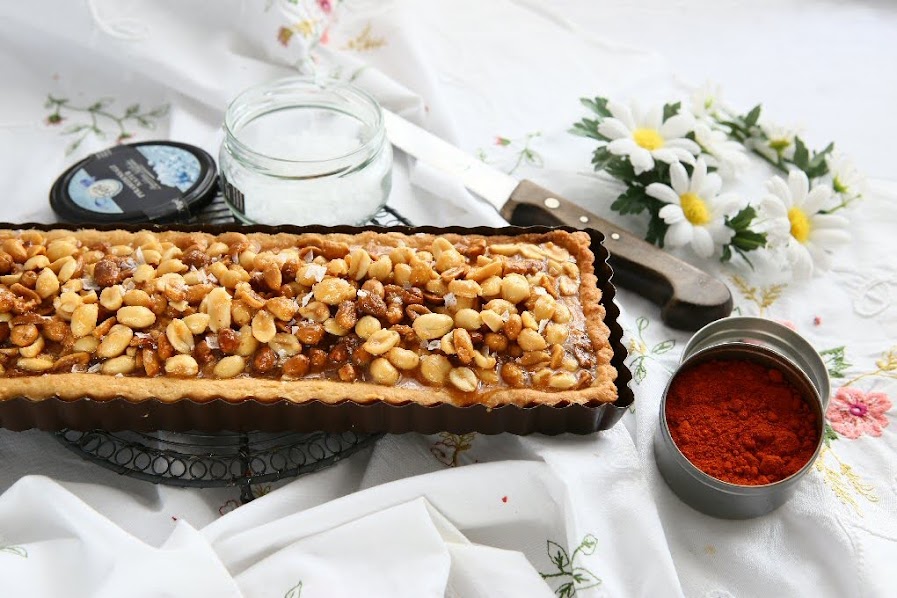
Honey Caramel Peanut Tart
 © 2021 | http://angiesrecipes.blogspot.com
 |
 |
 © 2021 | http://angiesrecipes.blogspot.com
 © 2021 | http://angiesrecipes.blogspot.com
A buttery shortbread cookie tart cradling luscious creamy honey caramel infused with cayenne pepper and loaded with salted roasted peanuts. The tart is great on its own or served with fresh whipped cream on the side.
| Pastry | Honey Caramel Peanut Filling |
|---|---|
|
|
- For the pastry, process the flour, icing sugar, salt and butter in a food processor until mixture resembles fine breadcrumbs. Add egg yolk and water. Process until mixture just comes together. Turn onto a work surface. Knead gently until just smooth. Shape into a disk. Wrap the dough disk in plastic and chill for 1 hour.
- Preheat oven to 200C/400F. Roll out dough between 2 sheets of baking paper until 4mm thick. Line a 35x11 cm rectangular fluted tart tin and a 12cm round fluted tart tin with removable base with pastry. Line with baking paper and pastry weights or beans. Bake for 15 minutes. Remove paper and weights or beans and bake for a further 15 minutes for the rectangular one, and 8-10 minutes for the small round one or until golden. Set aside to cool.
- Cook sugar, honey and water in a medium heavy-based saucepan over low heat, stirring until sugar dissolves. Increase heat to medium. Simmer, without stirring, for 7 minutes or until mixture reaches 173C/345F on a sugar thermometer. Quickly stir in heavy cream, butter, cayenne pepper and nuts. Continue cooking until the mixture reaches 248F/120C. Remove from the heat and quickly pour into tart. Sprinkle with sea salt.
- Set aside to cool to room-temperature. Cover with plastic wrap and place in the fridge for 1 hour. Cut tart into wedges and serve with whipped cream, if desired.

© 2021 | http://angiesrecipes.blogspot.com
 |
 |

© 2021 | http://angiesrecipes.blogspot.com

© 2021 | http://angiesrecipes.blogspot.com
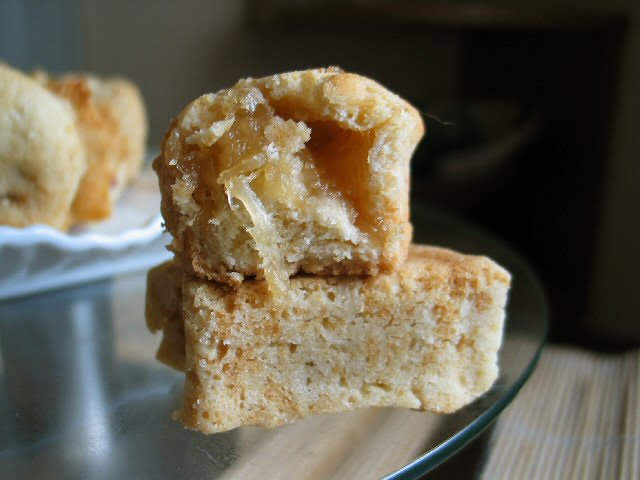
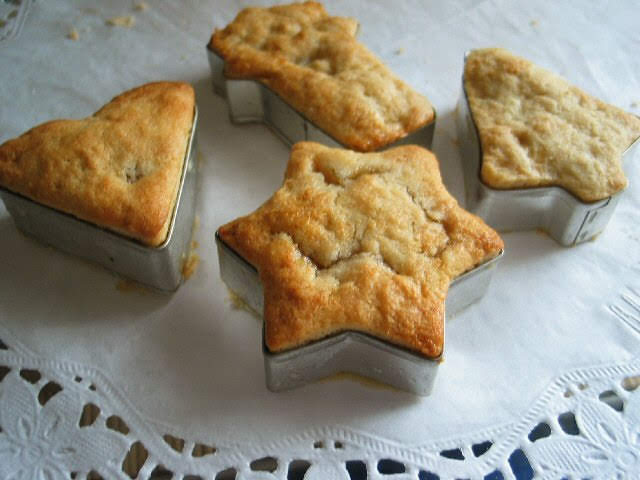
Taiwanese Pineapple Pastry


This is a very popular traditional Taiwanese dessert (凤梨酥, pronounced Feng Li Su) with a really yummy flaky pastry encased with a thick, not-too-sweet pineapple filling. Pineapple in Taiwanese or Hokkien means 'prosperous and thriving', they are therefore often given as a part of an engagement gifts, or simply as well-wishing presents around lunar Chinese New Year.
| Pastry | Filling |
|---|---|
|
|

 |
 |
 |
 |
- Drain pineapple well.Crush with a blender and place them in a skillet. Using medium heat, cook the drained crushed pineapple and sugar until most liquid has evaporated, and the filling turned golden. Stirring constantly using a wooden spoon to avoid burning. Set aside to cool.
- Beat shortening, butter and powdered sugar in a mixer until it turns light in color and fluffy. Gradually beat in whole egg and yolk until well combined. Sift in the flour and fold until just combined. Dissolve baking soda in the water and blend with the the mixture.
- Line baking trays with parchment paper. Divide the pastry dough and pineapple filling each into 28 equal rounds. Line work surface with large sheet of plastic wrap. Place and flatten the pastry dough on the plastic wrap with the palms and put the pineapple filling in the middle. and use the dough to cover the filling. Arrange it into moulds of your choice. Lightly draw the plastic wrap out of the mould, and turn the pastry onto the prepared tray. You can also grease the moulds and press the dough directly into the moulds. Bake in the preheated 170C/340F oven for about 22-25 minutes until light brown.


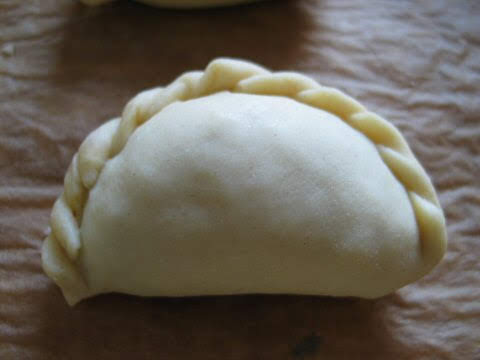
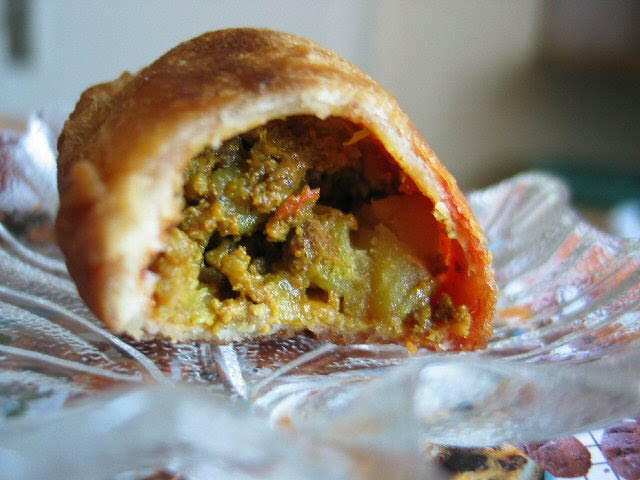
Curry Puffs

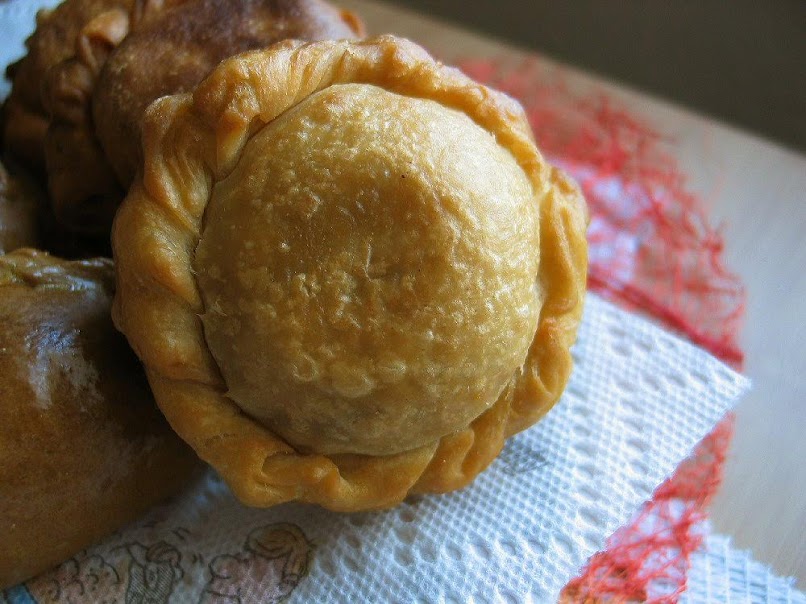

Curry Puff, a snack filled with curried mixture of meat, onion, and potato, is commonly found in Malaysia, Singapore and Thailand. Alternatively puff pastry (homemade or readymade) can be used. To fry or to bake them is not the question, because they both taste very good.
| Dough | Curry Filling |
|---|---|
|
|

 |
 |
 |
 |
- In a bowl, combine curry powder, chilli powder and Worcestershire sauce. Stir in 2 tablespoons of water to make a thick paste. Heat oil on high and stir fry onions and curry paste for 2 minutes. Add in minced meat, diced potatoes and bell peppers. Cook until the meat has turned browned. Pour in water and let simmer on slow-heat for approximately 20 minutes until potatoes are soft. Stir in sugar, and season the mixture with salt and pepper. Continue to cook until it is about dry. Transfer to a bowl and leave aside to cool.
- To make dough, sift together the flour, salt and baking soda in a mixing bowl. Rub ghee into the flour mixture until it resembles breadcrumbs. Add water gradually and press into a ball. Knead the dough by pushing away, using the heel of your hand until smooth. Wrap in plastic film and let it rest for half an hour.
- On a lightly floured work surface roll out the dough thinly. Cut into circles, 8 cm in diameter. Flatten each round with a rolling pin, fill with a tablespoonful of the filling. Fold pastry over to make a half circle and crimp at edges. Alternatively fill one pastry circle with 2 tablespoons of filling, top with another circle, then seal and crimp at edges. Deep fry in hot oil until golden. If you prefer them baked, brush the tops of each curry puff with the egg wash and bake in the 180C/350F hot oven for 25 minutes.


Rosemary, Black Olive and Cheddar Scones
 © 2020 | http://angiesrecipes.blogspot.com
 |
 |

http://schneiderchen.de | © 2020 | http://angiesrecipes.blogspot.com
 © 2020 | http://angiesrecipes.blogspot.com
These savoury scones, fresh out of the oven, are perfect for afternoon tea, or breakfast and are bursting with a rich, sharp Cheddar and fresh rosemary and black olives that add a pop of colour, texture and flavour. The leftover make a wonderful accompaniment to soups or casseroles for a cozy and comforting dinner.
|
- Preheat the oven to 200C/400F. Line a baking tray with baking paper.
- Whisk together the spelt flour, baking powder, baking soda and black salt in a bowl. Rub in ghee until the mixture resembles fine breadcrumbs. Add in chopped rosemary, olives and Cheddar. Gently mix together.
- Pour in cream and mix with a fork until it can be gathered into a soft ball. Turn out onto a lightly floured work surface and gently knead a few times.
- Using a lightly floured rolling pin, gently roll dough out until 2cm-thick. Using a 6cm heart-shaped cutter, cut out scones. Press leftover dough together. Repeat to make 12 scones.
- Place them on prepared tray. Brush with cream and bake for 15 to 17 minutes or until golden. Serve scones with homemade jam or butter.

http://schneiderchen.de | © 2020 | http://angiesrecipes.blogspot.com
 |
 |

http://schneiderchen.de | © 2020 | http://angiesrecipes.blogspot.com

http://schneiderchen.de | © 2020 | http://angiesrecipes.blogspot.com
Cruffins
 © 2019 | http://angiesrecipes.blogspot.com
 |
 |
 © 2019 | http://angiesrecipes.blogspot.com
A cruffin is simply a muffin made out of croissant dough. The pastry is made by proofing and baking laminated dough in a muffin mould or a popover tin would be even better. You can fill them with jam, cream, or curd. We prefer ours just plain or with a light dust of icing sugar because these croissant-muffins are rich enough to be savoured just as they are. These buttery, flaky cruffins are great for brunch or an afternoon snack and they are easier to make than you think.
|
- Mix the flour, dried yeast, sugar and salt in the bowl of your mixer fitted with a dough hook. Warm the milk and 50 grams of the butter in the microwave on medium-high or in a pot over stove until the butter melts and the mixture lukewarm.
- Add the milk mixture into the flour mixture. Stir the mixture on low speed for 5 minutes until a rough dough comes together. Increase the speed and knead until the dough becomes smooth and elastic, about 5 -7 minutes.
- Shape the dough into a ball and place in a large greased bowl. Cover with a plastic film or a clean kitchen towel. Set aside in a warm place for one hour until it doubles in volume.
- Grease a jumbo 6-hole muffin pan with butter. Punch dough down. Turn out onto a lightly floured surface. Divide the dough into 3 even portions. Roll out each dough into a 40x15cm rectangle. Next time I will roll out to 60cmx15cm, so that you have more layers.
- Spread 50 grams of butter all over the rectangle. Starting with the shorter side, roll up the dough tightly. Slice the roll lengthwise into two. Roll each half up from the side that was cut so that you can see the layers of dough. Place it into the prepared muffin tin. Repeat the same process with the remaining pieces of dough. Cover with a kitchen towel and allow the dough to rise for 45 minutes.
- Preheat oven to 200C/400F. Bake for 25-30 minutes on the highest rack in the oven until golden brown. Serve, dusted with icing sugar, immediately.

http://schneiderchen.de | © 2019 | http://angiesrecipes.blogspot.com

http://schneiderchen.de | © 2019 | http://angiesrecipes.blogspot.com
 © 2019 | http://angiesrecipes.blogspot.com
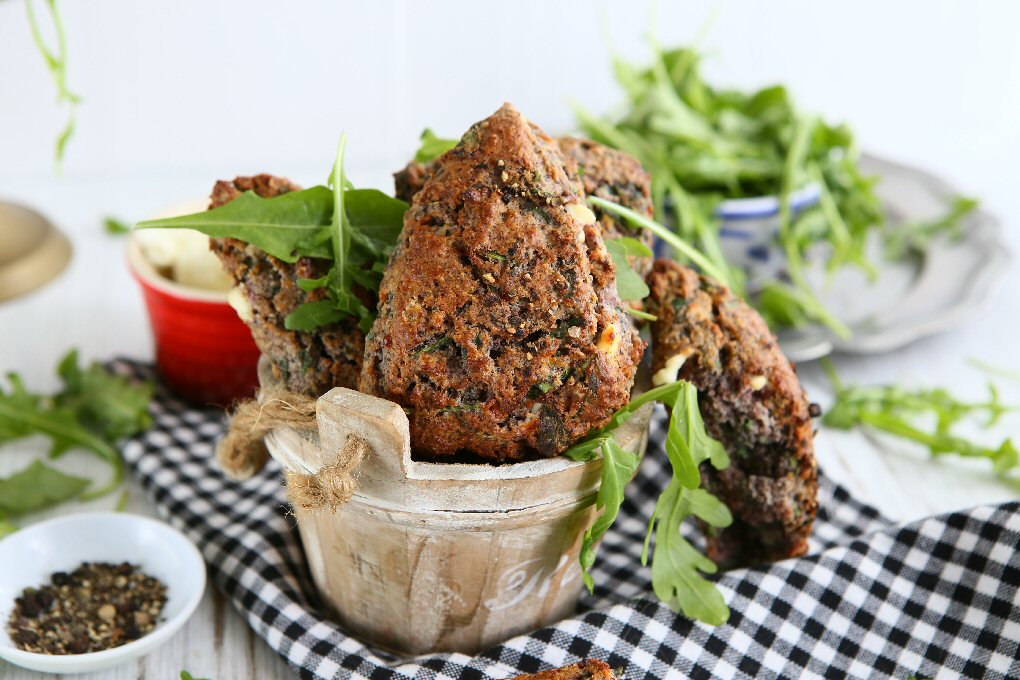
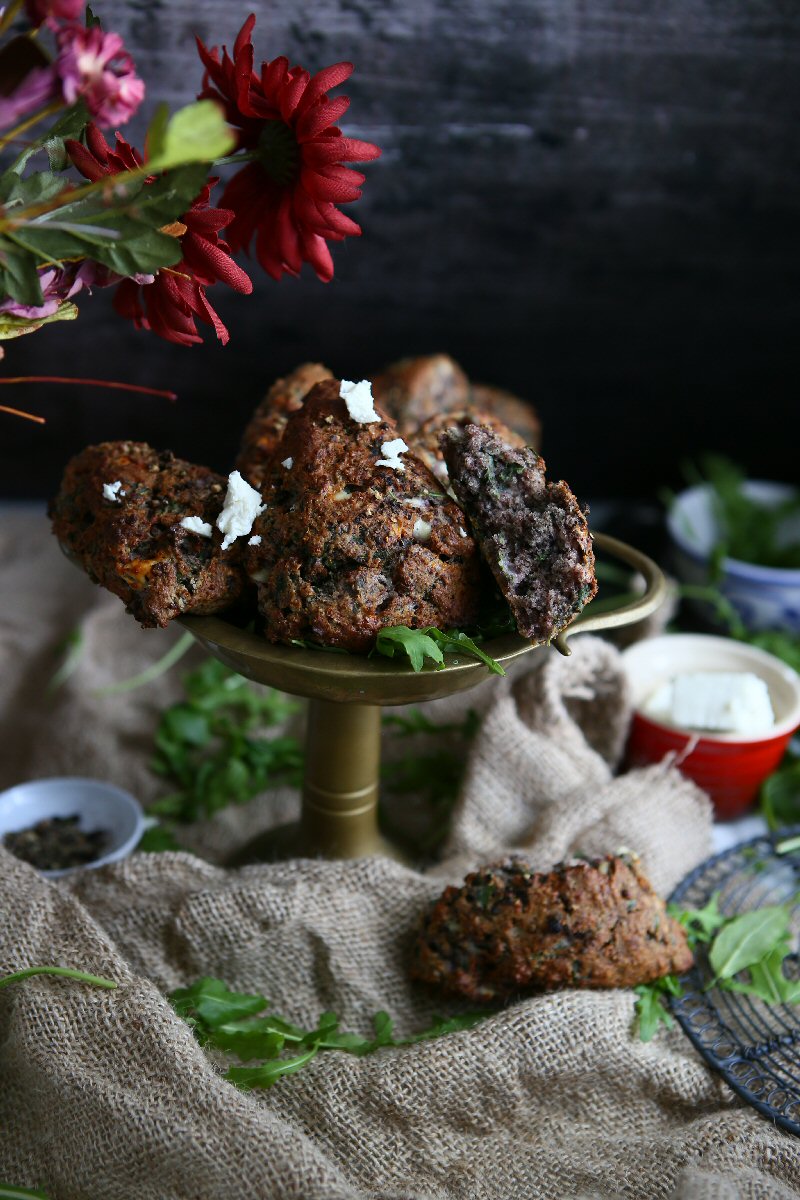
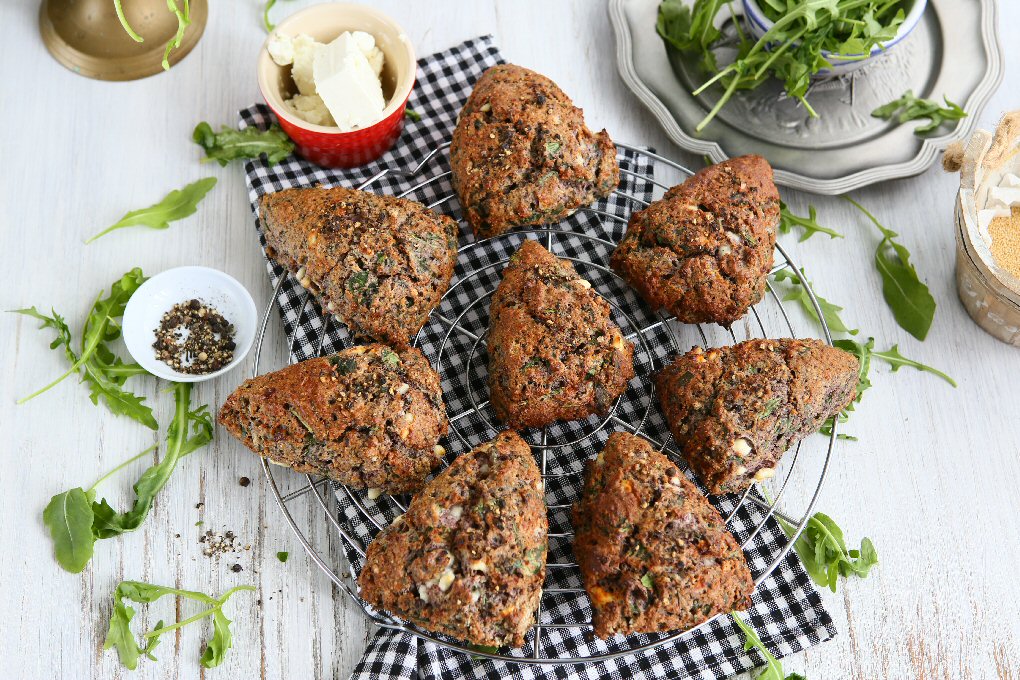
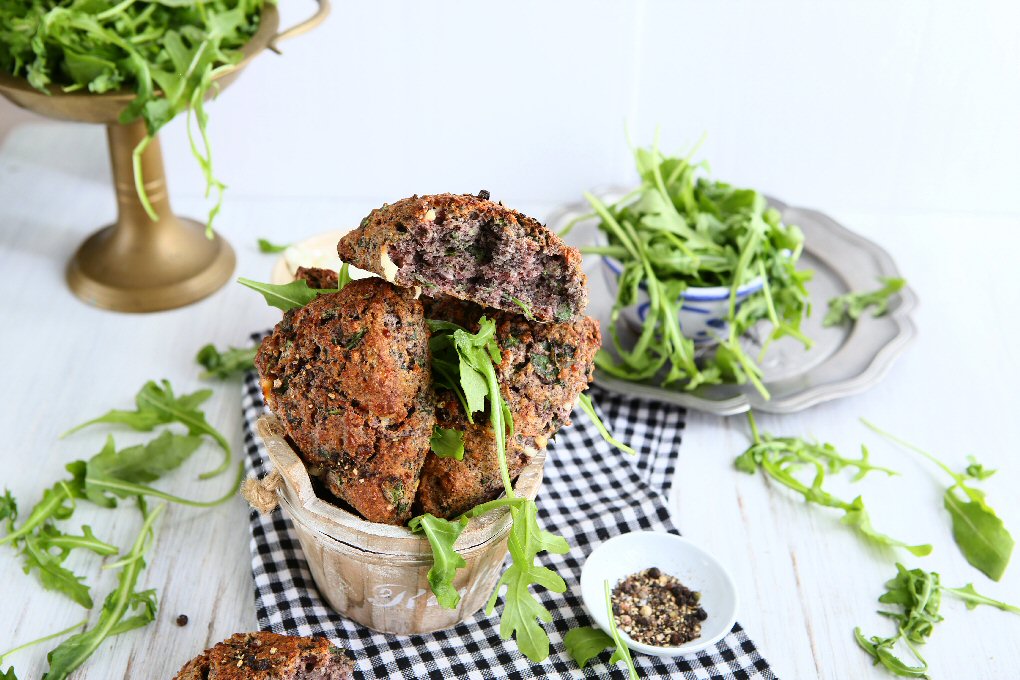
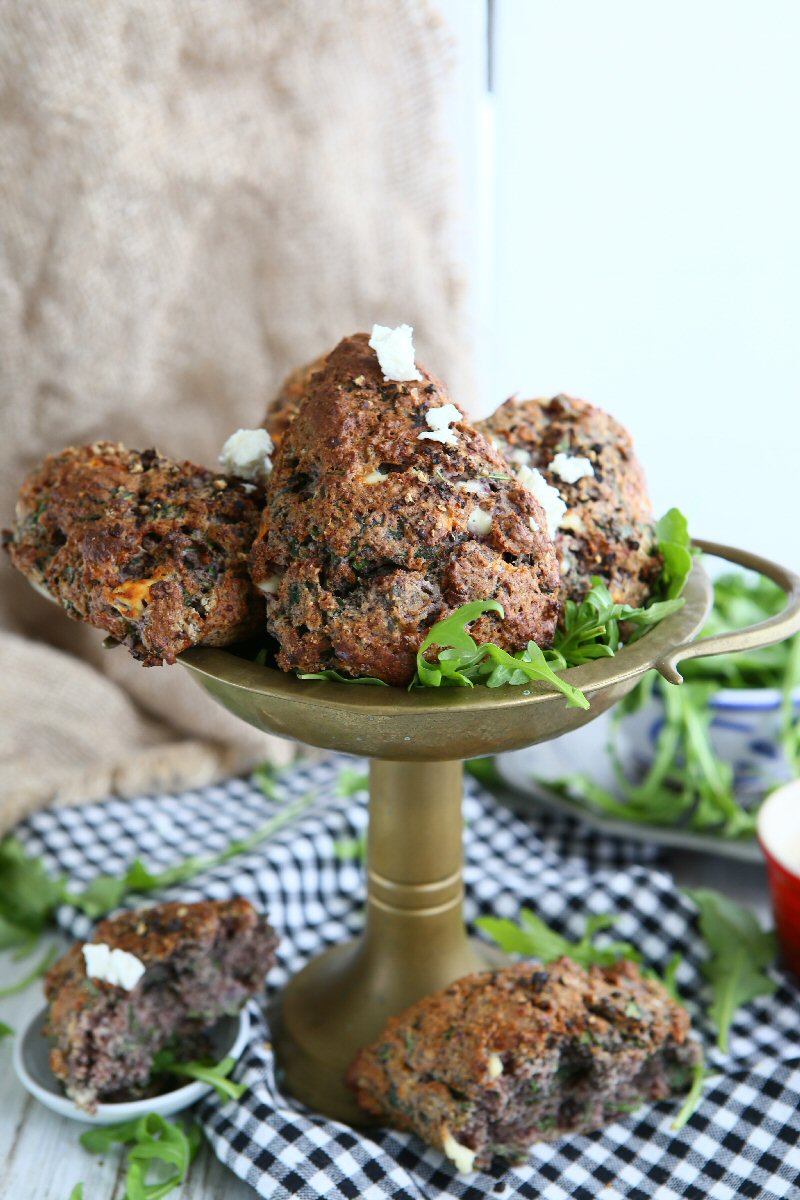
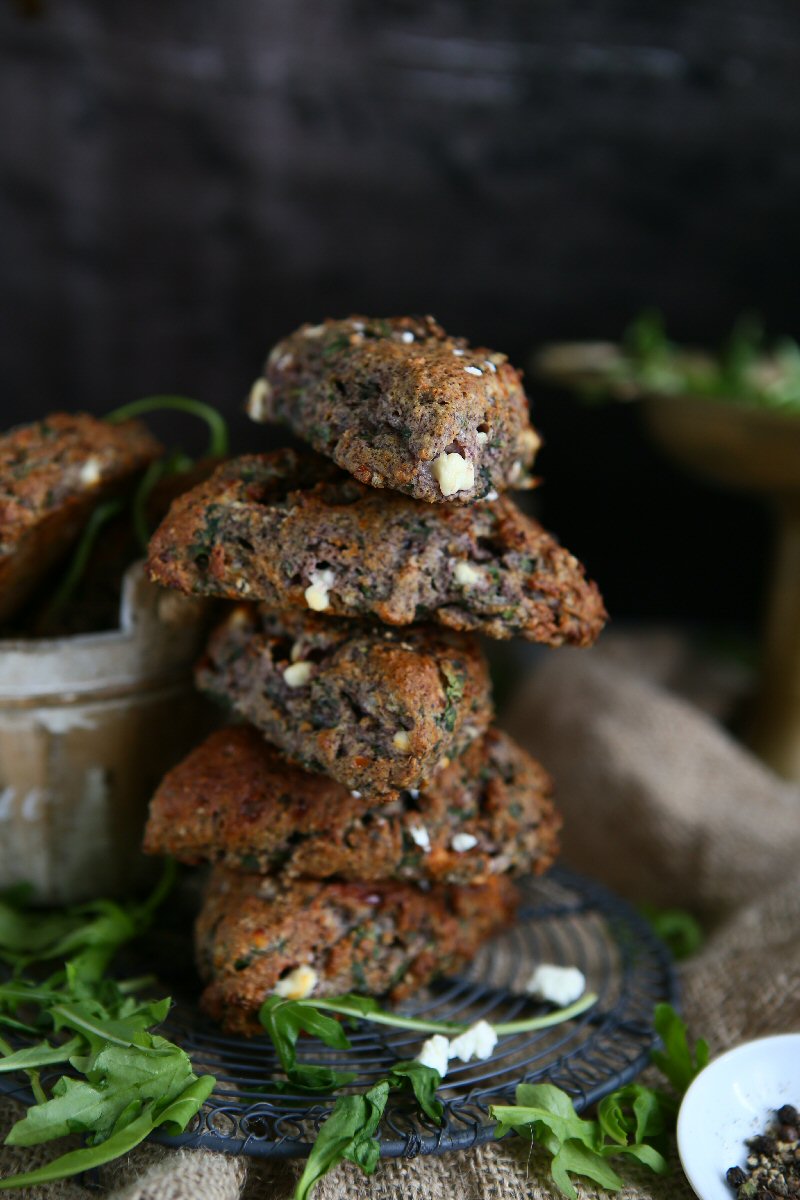
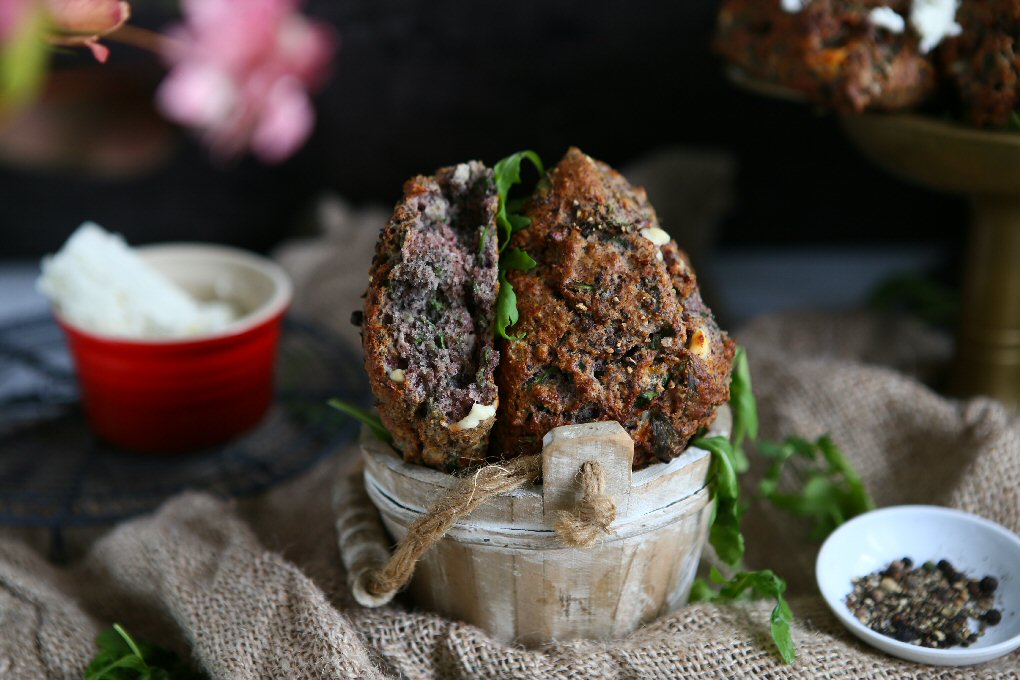
Black Rice Spelt Scones with Arugula and Feta
 © 2019 | http://angiesrecipes.blogspot.com
 |
 |
 © 2019 | http://angiesrecipes.blogspot.com
Made with freshly milled black rice flour and spelt, these savoury scones with Feta, sour cream and arugula are rich, crumbly, full of flavours and great either for a morning tea or the perfect accompaniment to a bowl of soup for a comforting meal.
|


- In a large mixing bowl, whisk together the spelt flour, black rice flour, baking powder, baking soda and coconut sugar. Add in cold butter. Using fingertips, rub butter into flour mixture until mixture resembles fine breadcrumbs. Place it in the freezer for 30 minutes. This helps chill the butter, which will make the scones flakier.
- Take it out and crumble in Feta and add in chopped arugula. Stir in sour cream to get a soft dough.
- Turn on to a lightly floured work surface and knead very lightly. Pat out to a 2cm thick round. Cut into 8 wedges. Brush the top with sour cream and sprinkle some cracked black pepper over. Place it back to the freezer for 30 minutes. This again will help chill the fat, so that the scones would be flakier.
- Preheat the oven to 220C/425F. Bake the scones in the upper part of your oven for 18 to 23 minutes, or until they're a light golden brown.
- Remove the scones from the oven, and cool briefly on the pan. Serve warm.
http://schneiderchen.de | © 2019 | http://angiesrecipes.blogspot.com
 |
 |
http://schneiderchen.de | © 2019 | http://angiesrecipes.blogspot.com
Fig and Prosciutto Puff Pastry Tart

http://schneiderchen.de | © 2019 | http://angiesrecipes.blogspot.com
 http://schneiderchen.de | © 2019 | http://angiesrecipes.blogspot.com
 |
 |
Bring a standard everyday salad to life with this beautifully balanced tart that combines sweet, juicy figs with salty proscuitto on top of flaky golden puff pastry. With figs in season, there's no better time to try this simple recipe. Drizzle with a fig or raspberry balsamic syrup for an explosion of flavours. Use other greens, like baby arugula or watercress instead of lamb's lettuce if you like. It is perfect for a light lunch or as an appetizer of a dinner party.
|
- Preheat the oven to 200C/400F. Take your sheet of puff pastry and unroll. Using a sharp knife carefully score a border about 2cm thick around the edges of the pastry making sure you don’t cut all the way through. This will act as a frame and help to hold the filling in while baking.
- Using a fork carefully prick the centre part of the pastry to encourage it not to rise too much. Bake for 20-25 mins or until golden brown and puffed.
- Place the pastry on a large serving platter. Top with the lamb's lettuce, Belgian endive, fig wedges, and torn prosciutto. Drizzle with balsamic glaze and garnish with fresh dill.

http://schneiderchen.de | © 2019 | http://angiesrecipes.blogspot.com
 |
 |

http://schneiderchen.de | © 2019 | http://angiesrecipes.blogspot.com
Vegetable Ribbon Tart with Pesto and Ricotta
 http://schneiderchen.de | © 2019 | http://angiesrecipes.blogspot.com
 |
 |
 http://schneiderchen.de | © 2019 | http://angiesrecipes.blogspot.com
This delicious vegetable tart is filled with a layer of homemade pesto and ricotta and top with a spiral of thinly sliced ribbons of zucchini and carrots. Spelt flour gives the pastry a nutty flavour which works so well with the pesto filling. This vegetable tart is lovely for either lunch or as an appetizer.
| Crust | Filling |
|---|---|
|
|
- Tip the flours into a bowl with black salt. Add the butter and rub in using your fingertips until it resembles breadcrumbs. Stir through the cheese with a knife. Drizzle over buttermilk, then use the knife to stir it in until clumps of dough start to form. Turn out onto a work surface and bring the dough together with your hands into a smooth ball. Alternatively, you can make the pastry in a food processor. Shape into a disc, wrap in cling film and chill for at least 30 minutes.
- Use a vegetable peeler or mandolin to thinly slice carrots and zucchini lengthways into long thin ribbons. Stir together the pesto and ricotta. Season with salt and pepper.
- Preheat oven to 200C/400F. Lightly grease the base and sides of an 22cm tart pan with removable base. Roll pastry between 2 sheets baking paper until 3mm thick and large enough to line prepared pan. Press pastry into the pan. Trim edges. Line pastry with baking paper. Fill with pastry weights or rice. Bake for 10 minutes. Remove paper and weights or rice. Bake for a further 5 minutes or until light golden and just crisp.
- Remove the tart shell from the oven and reduce oven to 180C/350F. Spoon the prepared filling into pastry case, pressing down gently with back of spoon to level.
- Starting from the outside, arrange the vegetable ribbons to form concentric circles to fill the shell. Brush all over with the avocado oil, and sprinkle with freshly milled salt and pepper to taste. Return it to the oven and bake for 35-40 minutes until the vegetables are cooked through. Sprinkle some extra pine nuts over if desired. Slice into wedges to serve.

http://schneiderchen.de | © 2019 | http://angiesrecipes.blogspot.com
 |
 |

http://schneiderchen.de | © 2019 | http://angiesrecipes.blogspot.com
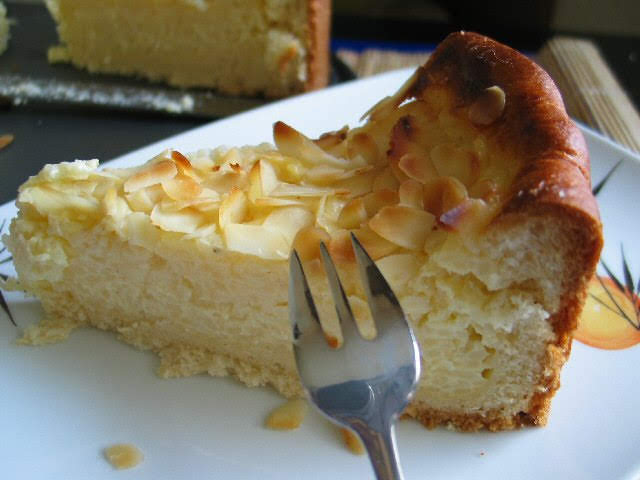
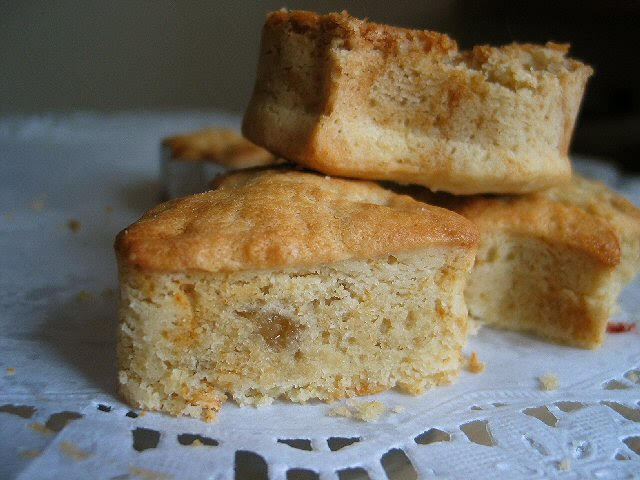
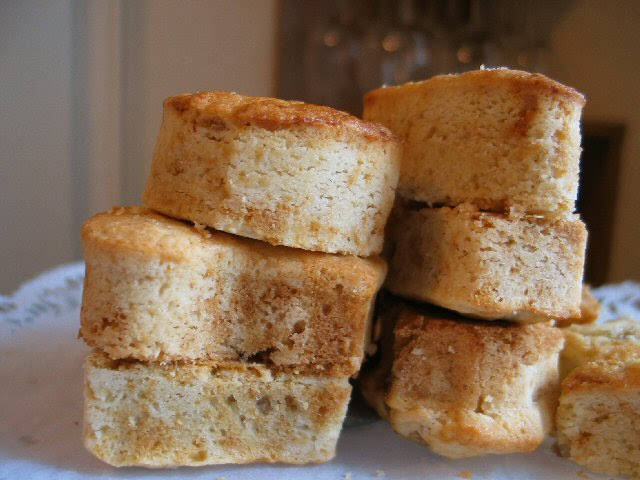
Rijstevlaai / Dutch Rice Pudding Pie
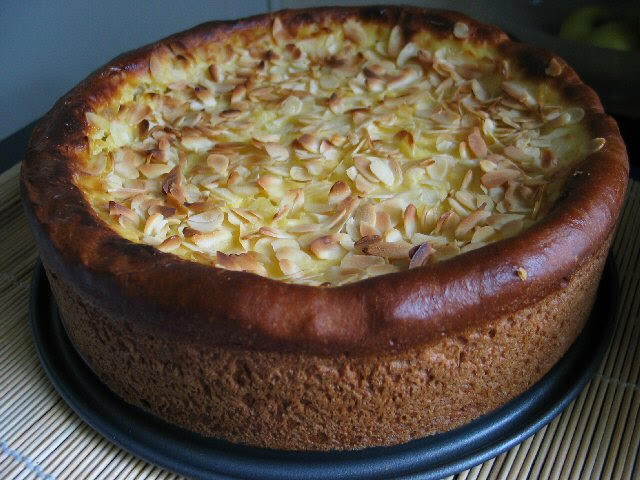
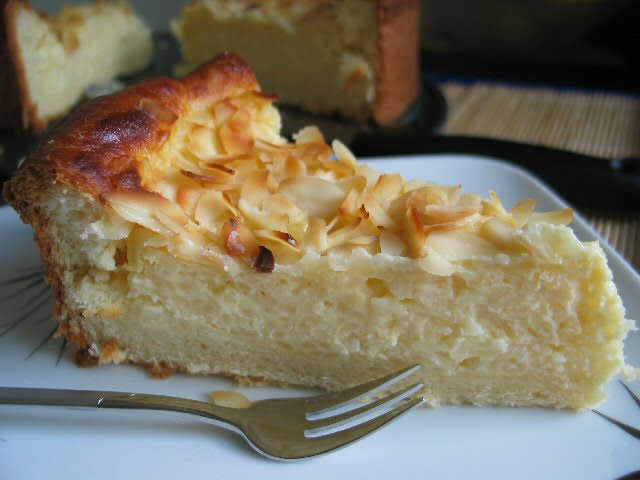
"Rijstevlaai" (pronounced as raced-a-fly or raced-a-fla, depending on where you are from in Holland) is a delicious, creamy rice pudding pie that uses yeast dough instead of a pastry crust. It's filled with short grain rice cooked in milk, enriched with eggs and sugar. It can be served plain or whipped cream and some chocolate shavings atop. Serve cold or at room temperature.
| Dough | Rice Pudding |
|---|---|
|
|
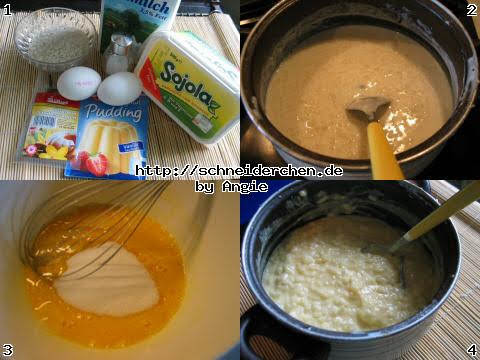
- In a bowl whisk together the milk, yeast and sugar. Combine flour and salt together in another mixing bowl. Pour the yeast mixture into the flour. Beat in egg and butter until the dough is fairly smooth. Cover with a cling film and let rise until doubled. Butter 10-inch-diameter springform pan. Press down the dough to release the air. Pat dough over bottom and sides of prepared pan. Cover and allow to rise until doubled.
- Bring milk to a boil in a large saucepan. Stir in rice, salt and vanilla bean, which can be used either whole or split to reveal the seeds and scraped into the rice. Bring them to a boil. Reduce heat to low and simmer uncovered until most of milk is absorbed and mixture is thick but still creamy, stirring frequently, about 30 minutes. Whip together 2 eggs, 80 grams sugar and pudding powder. Add the mixture into the rice and stir 2 minutes. Remove mixture from heat and cool to lukewarm.
- Preheat oven to 200C/400F. Pour the rice pudding into the risen dough and sprinkle the almond slices on the top of the pudding if using. Bake in the middle of preheated oven for 1 hour. Cool the cake completely in tin placed on a wire rack.