Featured Recipe

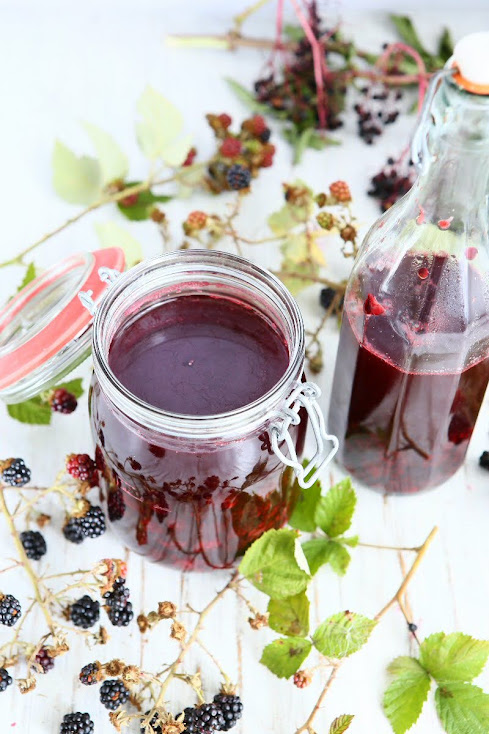
Blackberry Vinegar
 © 2022 | http://angiesrecipes.blogspot.com
 |
 |
 © 2022 | http://angiesrecipes.blogspot.com
This blackberry vinegar recipe is easy to make and the perfect addition to a summer salad or use it like a cordial with hot water and a teaspoon of honey for the ultimate sore throat remedy. It's extremely cheap to make using blackberries you've picked yourself. Blackberries are easy to identify and are plentiful, so it's really easy to grab yourself a handful.
|
- Add the vinegar and blackberries to a large stainless steel saucepan and bring to a boil over high heat. Reduce heat to low and allow to simmer for 5 minutes. Remove from the heat and allow it to cool completely.
- Place the vinegar in a covered, airtight container and allow to sit at room temperature for 2 weeks.
- Strain the vinegar in a fine mesh strainer and discard the blackberries. Store the vinegar in sterilized bottles. Store in a cool, dry place for up to 6 months.


© 2022 | http://angiesrecipes.blogspot.com
Spiced Plum Ketchup
 © 2022 | http://angiesrecipes.blogspot.com
 |
 |
 © 2022 | http://angiesrecipes.blogspot.com
A sweet, sour, and aromatic condiment made from foraged mriabelles and cherry plums. You can also use damsons or any other varieties. This is delicious served with cold meats, sausages, pork and cheese and will keep for up to 9 months outside of fridge in a cool, dry, dark place since it's water bath processed. You can skip the process, but the ketchup has to be stored in the fridge for up to 6 weeks.
Low Sugar Blackberry Jam without Pectin
 © 2022 | http://angiesrecipes.blogspot.com
 |
 |
 © 2022 | http://angiesrecipes.blogspot.com
Blackberries are naturally high in pectin, so it’s easy to make a simple blackberry jam with no added pectin. All you need is blackberries and a little bit of sugar or honey for blackberry jam, but a little splash of lemon juice, which is also very high in natural pectin, will help naturally set the jam and bring out the best berry flavour.
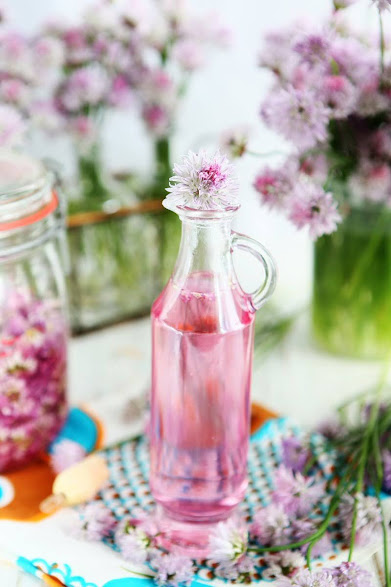
Chive Blossom Vinegar
 © 2022 | http://angiesrecipes.blogspot.com
 |
 |
 © 2022 | http://angiesrecipes.blogspot.com
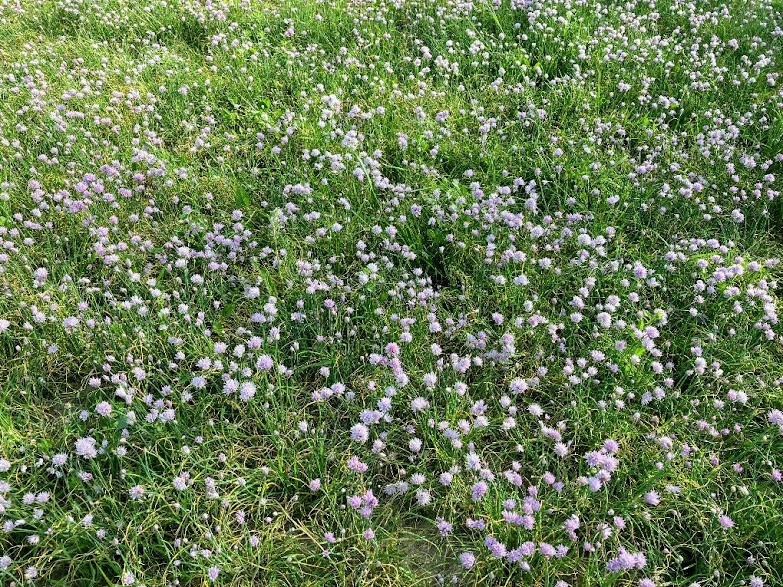
Edible flowers can add a splash of colour and fun to a wide variety of dishes and chive blossoms are one of the few that add flavour too. This pretty, light purple, edible flower smells mildly of garlic with a hint of floral and taste similar to chives. They can be used dried or fresh, tossed in a salad, to garnish a dish, or used to make compound butter. They are also an excellent ingredient to infuse vinegar. Making infused vinegar is a great way to preserve the flavour of chive blossoms, and it makes a thoughtful hostess gift.
If you want a more onion-y flavour to the finished vinegar, add 2-3 tablespoons of chive leaves. White wine vinegar works well with chive blossoms, but champagne vinegar or apple vinegar would work just fine too. Just keep in mind that using stronger flavoured vinegars, the flavour and the colour of final infused vinegar would be different.
You can double the recipe if you have lots of chive blossoms. The finished chive blossom vinegar will keep for up to 6 months at room temperature in your cabinet or a year in a sealed bottle in the refrigerator. Use chive blossom vinegar in marinades, salad dressings, drizzle on roasted vegetables, and for any recipe where you would like to add mild onion flavour to.
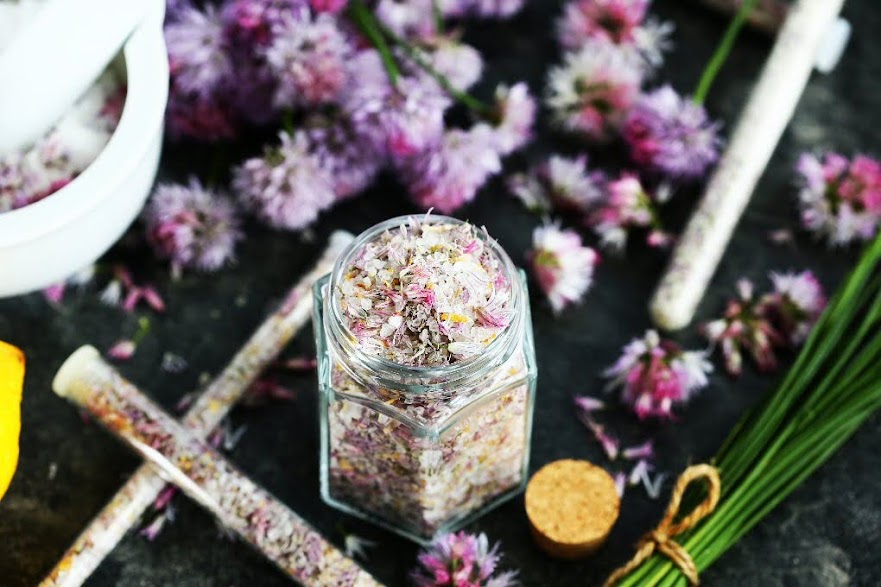
Chive Blossom Salt
 © 2022 | http://angiesrecipes.blogspot.com
 |
 |
 © 2022 | http://angiesrecipes.blogspot.com
 © 2022 | http://angiesrecipes.blogspot.com
 © 2022 | http://angiesrecipes.blogspot.com
Finishing salts are an easy and perfect way to use the herbs in your garden and they make beautiful and delicious handmade gifts for the family and friends. The chive blossom salt not only tastes fantastic, but also looks great with its light purple colour.
You can use chive blossom salt on grilled meats and veggies, sprinkle it over avocado toast, and salads, or use it to make a compound butter. My favourite way to use it is to season a blue steak, salad, roasted asparagus and Quark cheese-so simple yet so dang tasty.
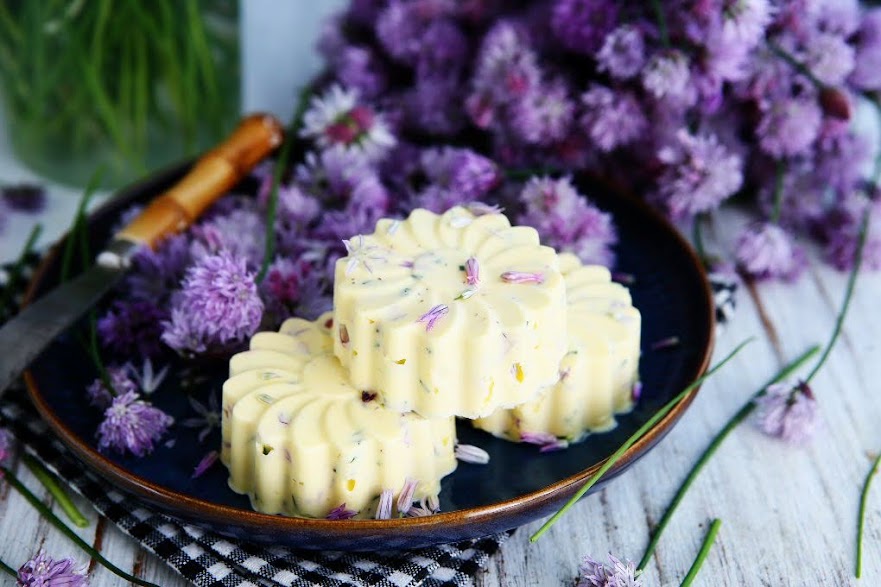
Chives Blossom Butter
 © 2022 | http://angiesrecipes.blogspot.com
 |
 |
 © 2022 | http://angiesrecipes.blogspot.com
Chive blossoms are a colorful and flavourful edible flower that will appear at the end of chive stalks in late springtime. These pale purple pompoms taste slightly stronger than the chive leaves, but still very mild, and they are simply beautiful in a wide range of recipes.
Chive bloosm flavoured butter is an easy compound butter, that makes food so much more interesting and better with that delicate onion flavour. The flowerless chive leaves are available all year round in supermarkets, but not the blossoms. If you don't grow chives, you might be able to find these scrumptious little gems at farmers markets in May and June, or forage them in the wild.
|
- Thoroughly wash the chive and the blossoms. Pat them dry with paper towels or dry them in a salad spinner. Finely chop the chives. Separate the flower petals from the stem.
- Mix salt into butter. When the salt is completely incorporated into the butter, add in the chopped chive and blossoms. Mix until well blended.
- Fill a few of silicone muffins cups with butter and freeze for 30 minutes. Once they are firm, it's very easy to remove them. Store the butter, covered or wrapped, in the fridge a couple of hours to let the flavours meld.
- You can simply throw the butter in a container or jar, or shape it into a log. Chill until firm. Use the chive blossom butter for bread, steak, fish, grilled vegetables or to toss with pasta.

© 2022 | http://angiesrecipes.blogspot.com

© 2022 | http://angiesrecipes.blogspot.com
 |
 |
© 2022 | http://angiesrecipes.blogspot.com

© 2022 | http://angiesrecipes.blogspot.com
How To Make Wild Garlic Flavoured Oil
 © 2022 | http://angiesrecipes.blogspot.com
 |
 |
 © 2022 | http://angiesrecipes.blogspot.com
Infusing or flavouring oil is a great way to capture the flavour of fresh herbs without preserving the herbs themselves. However, homemade herb-flavoured oils do not stay fresh for long and should be used within a short time, esp. the one with fresh herbs, or they go rancid and get spoiled very quickly. It's easy to make flavoured oils at home and they make a great gift for the friends and family.
Incorporating wild garlic into oil means you can enjoy its health benefits all year around and inject this distinctive SPRING flavour into all sorts of dishes like salad dressings, marinades, a dip for homemade bread, meat, fish, grilled vegetables, or drizzling over soups or pizza. You can even use it for sautéing and stir-frying, but its flavour is most intense if used uncooked. If using fresh herbs, strain them out of oil by pouring oil from bottle through a strainer or coffee filter and into a new bottle. Dried herbs can remain in oil, but oil will stay fresh a bit longer if they are also strained out.
Dehydrator-drying is an easy and effective way to dry herbs for best flavour and quality. Once the moisture is extracted, not only is the shelf life long but the flavour intensified. Simply place washed herbs in a single layer on dehydrator trays. Set the thermostat to 30C/85F to 50C/120F. Drying time varies from 1 – 3 hours. Check your dehydrator manual for exact temperature and drying time.
|
- Wash and spin dry the wild garlic leaves. Spread the prepared wild garlic leaves in a single layer on dehydrator trays. Set the dehydrator to 30C/85F to 50C/120F. Dry 1-3 hours or until the herbs are dry and crumble easily. Do check your dehydrator manual for exact temperature and drying time.
- If you don't have a dehydrator, set your oven on it's lowest, spread the wild garlic leaves on cookie sheets and dry them with the door propped open a little. Periodically check the leaves and move them round, so that they dry evenly.
- Sterilize clean glass bottles or jars by boiling in water for 10 minutes. Allow the bottles or jars to dry thoroughly before using.
- Place the dried wild garlic leaves in a tall cylinderial container or a tall pitcher and add in oil. Mix for 30 seconds with an immersion blender until combined. You can do this with a food processor too.
- Seal the bottles with the lids and leave them in a cool, dark place for about one week before using. The intensity of the flavour increases over time. Strain the herbs if desired.

© 2022 | http://angiesrecipes.blogspot.com

© 2022 | http://angiesrecipes.blogspot.com

© 2022 | http://angiesrecipes.blogspot.com
How to make Wild Garlic Salt
 © 2022 | http://angiesrecipes.blogspot.com
 © 2022 | http://angiesrecipes.blogspot.com
 |
 |
 © 2022 | http://angiesrecipes.blogspot.com
 © 2022 | http://angiesrecipes.blogspot.com
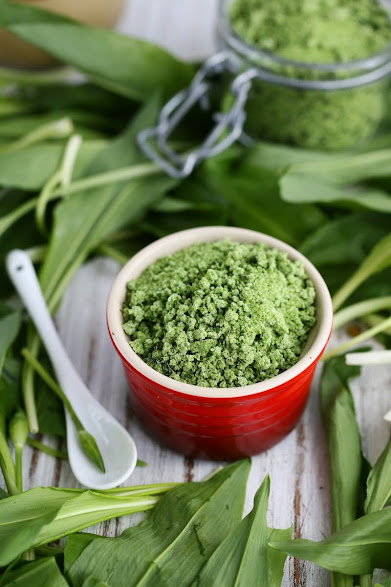
A great way to make the most of the very short wild garlic season is to find delicious ways to preserve them so that they can be enjoyed all year round. The deep intense flavour of wild Garlic foraged from the forests on the Rhine blended with sea salt makes this seasoning really healthy and addictive. This flavoured salt gives every dish that certain something extra and can be enjoyed in a variety of ways. It's ideal as a finishing salt for barbecued meats, sprinkled over fresh vegetables, on pasta, or baked into fresh bread. Use sea salt for your infused salt. It is much more aromatic and contains no additives such as iodine, which can lend a bitter taste to foods salted with table salt. Whether you take a small or large crystals is up to you. Coarse sea salt with wild garlic is perfect for the spice mill.
|
- Rinse the wild garlic leaves and pat them dry using kitchen paper or a kitchen towel. Roughly chop the wild garlic leaves.
- Place the chopped garlic leaves in a food processor. Add in 100 grams of sea salt. Blend them into a smooth paste.
- Pour the remaining salt into a bowl and add the wild garlic paste. Mix thoroughly until all of the salt is consistently green throughout.
- Spread out the mixture in a thin layer on a baking sheet lined with parchment paper. Let the wild garlic sea salt dehydrate in the oven for about 2-3 hours at 50C/120F degrees. You can also dehydrate the infused salt in your dehydrator. Check the salt once an hour and mix to make the salt dehydrate completely. If weather allows, dry the mixture in the sun for 24 hours or until completely dry.
- Place the wild garlic sea salt in an airtight container and leave it in a cool, dry, dark location. The flavoured salt does not have an expiry date but will lose its intensity over time. If you store it properly, it can potentially have an indefinite shelf life. But for optimal flavour and colour, use it up in 2-3 years or just until next wild garlic season.

© 2022 | http://angiesrecipes.blogspot.com
 © 2022 | http://angiesrecipes.blogspot.com
 |
 |

© 2022 | http://angiesrecipes.blogspot.com

© 2022 | http://angiesrecipes.blogspot.com

© 2022 | http://angiesrecipes.blogspot.com