
Spelt Bread with Blueberry Wild Yeast Water
 © 2022 | http://angiesrecipes.blogspot.com
| bubbly active blueberry wild yeast | |
|---|---|
 |
 |
 © 2022 | http://angiesrecipes.blogspot.com
A simple artisan bread prepared with wild yeast water that's cultivated with 150 grams of fresh organic blueberries and 500 ml filtered tap water. Mix them in a plastic or glass container and let sit 5-6 days until bubbly and active before using. You don't have yeast water yet? Here you can find out how easy it is to grow and use the wild yeast. A preferment was then mixed and perfemented using a portion of active wild yeast water and flour 12-18 hours in advance of mixing the final dough. Using a preferment in bread is to delay the fermentation, so the yeast and natural enzymes present in flour have time to take action on the starches and proteins in the dough, resulting in a more complex, flavourful bread.
The preferment can be of a stiff texture, it can be quite loose in texture, or it can simply be a piece of mixed bread dough. Some preferments contain salt, others do not. In general, 1/4 to 1/2 of a bread recipe's total flour will be used to create a preferment. The amount of liquid depends entirely on what kind of preferment you are going to use. High hydration poolish (usually 100% hydration), low hydration biga (usually 60% hydration) and pâte fermentée, aka chef, or old dough (the same hydration level of its final dough) are the three “mother preferments”.
Rye Mixed Bread with Wild Yeast Starter
 © 2022 | http://angiesrecipes.blogspot.com
 |
 |
 © 2022 | http://angiesrecipes.blogspot.com
 © 2022 | http://angiesrecipes.blogspot.com
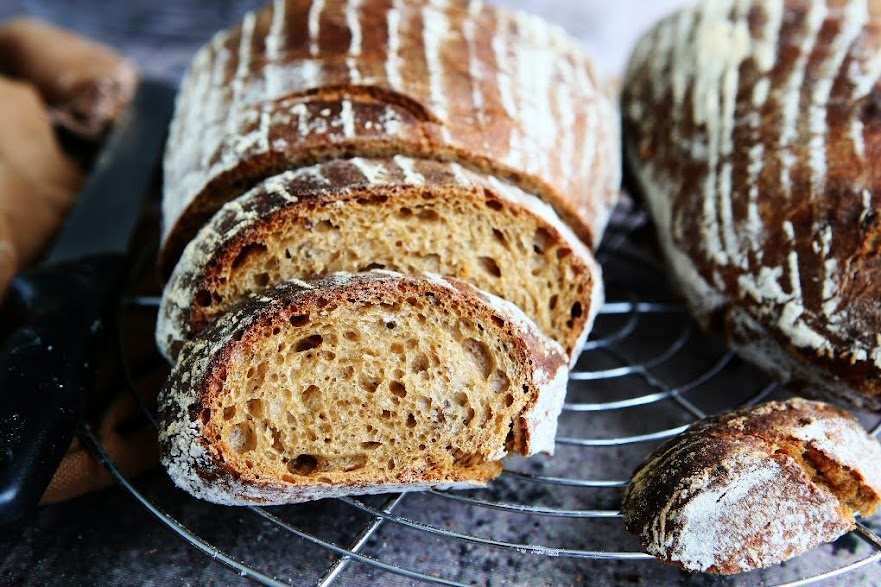
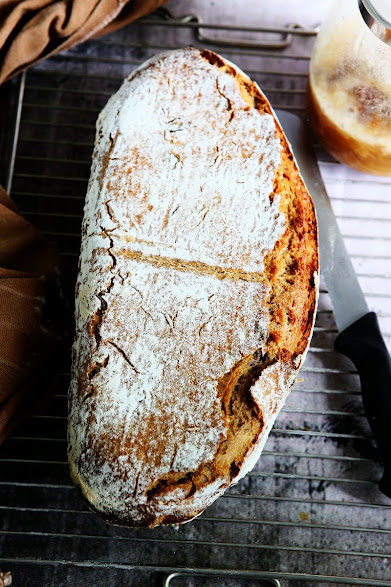
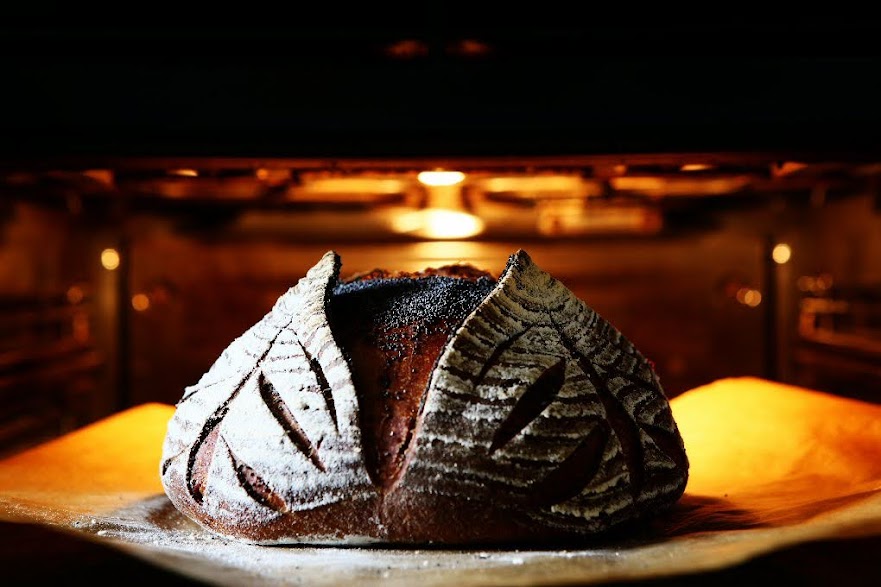
A fun bread recipe for a hearty, healthy and sensationally aromatic, crispy and rustic rye mixed bread made from wholemeal rye and wheat flour. A cultivated wild yeast starter is used as a leavening agent, which ensures a fine flavour, aroma, long freshness and at the same time a good oven spring. Barley malt extract not only contributes to the flavour but also encourages a browner crust and a glossy sheen. If you don't have barley malt extract, then a good substitute will be sugar beet syrup, honey or molasses. All in all, a very tasty, wholesome bread that goes well with hearty dishes or toppings. Or simply enjoy it with a generous smear of butter - you absolutely have to try it.
Rye Mixed Bread with Wild Yeast Starter
inspired and adapted from here and here| Wild Yeast Starter | Dough |
|---|---|
|
|
 |
 |
 |
 |
- Puree the fruit with the yeast water. Mix in the flour and leave to rise at room temperature for 12-14 hours.
- Add the wild yeast starter, buttermilk and all the flour to the bowl of your mixer and knead on the lowest speed for 3 minutes. Add the yeast water a little at a time as the dough absorbs the liquid. Increase the speed to medium and knead for a further 8-10 minutes. After 5 minutes, knead in the salt.
- Grease a large bowl with some olive oil and place in the dough. Stretch and fold once on all sides. Leave to ferment at room temperature for 5-6 hours, folding again after 1 and 2 hours if possible.
- Shape the dough into a baton and place in an oblong floured proofing basket with the end facing upwards. Cover and leave to rise for another 3-4 hours at room temperature.
how to shape a baton
- Preheat the oven to 250C/480F. Place a baking stone in the lower half of the oven. If you don't have a baking stone, a baking tray works too. At the bottom of your oven, place a baking tray for water to create the steam.
- Dust a parchment paper with flour. Turn the dough out onto the floured parchment paper. Transfer to the hot baking stone. Pour 1 cup of water into the baking tray at the bottom of your oven. Close the oven door immediately.
- After 10 minutes, turn the heat down to 200C/400F and open the oven briefly so that the steam can escape. Bake for another 30-35 minutes until bread is golden brown and crisp. Remove and cool the bread on a wire rack for at least 2 hours before slicing.

© 2022 | http://angiesrecipes.blogspot.com

© 2022 | http://angiesrecipes.blogspot.com

© 2022 | http://angiesrecipes.blogspot.com
Wild Yeast Ciabatta using Yeast Water and Bassinage Method
 © 2022 | http://angiesrecipes.blogspot.com
 © 2022 | http://angiesrecipes.blogspot.com
 |
 |

 © 2022 | http://angiesrecipes.blogspot.com
Yeast is a living microorganism that feeds on carbohydrates / sugar and releases carbon dioxide and alcohol that helps to leaven bread and enable fermentation. Wild yeast is found everywhere in the nature and can be easily captured from plants and animals. Your skin is even home to different types of yeast.
Fresh fruits, vegetables, or herbs can be used to capture wild yeast, but the easiest way to capture wild yeast is to use dried fruit, making sure that the fruit ain't treated with sulfur dioxide.
Fill a glass bottle with lukewarm water, add in dried fruit (and honey / sugar to speed up the fermentation process ). Seal the bottle with a ballon or a latex glove (as the yeast feeds on the sugar, it produces carbon dioxide and tremendous pressure can develop in the bottle ) and leave it at room temperature in a place away from direct sunlight or heat. The yeast is ready when bubbles appear and the liquid is frothy on top, which will take about 4-5 days. Strain out the liquid and use the wild yeast water for baking in place of both the liquid and baker’s yeast in recipes. You can also use the wild yeast water to make sourdough starter.You can discard the fruit or use it for baking.
Bassinage is a French term for pouring or bathing in water. In bread, the bassinage method makes the initial dough stiffer by holding back some of the water. After the gluten has developed, the second water is added to the dough. This method increases the amount of water that the dough can retain and produces a more open crumb.
Ciabatta is a rustic Italian bread that is usually made from wheat bread flour, water, olive oil, salt, and yeast. The name means “slipper” in Italian and refers to its elongated, broad, and flat shape, but you can form ciabatta into small squares or rolls.
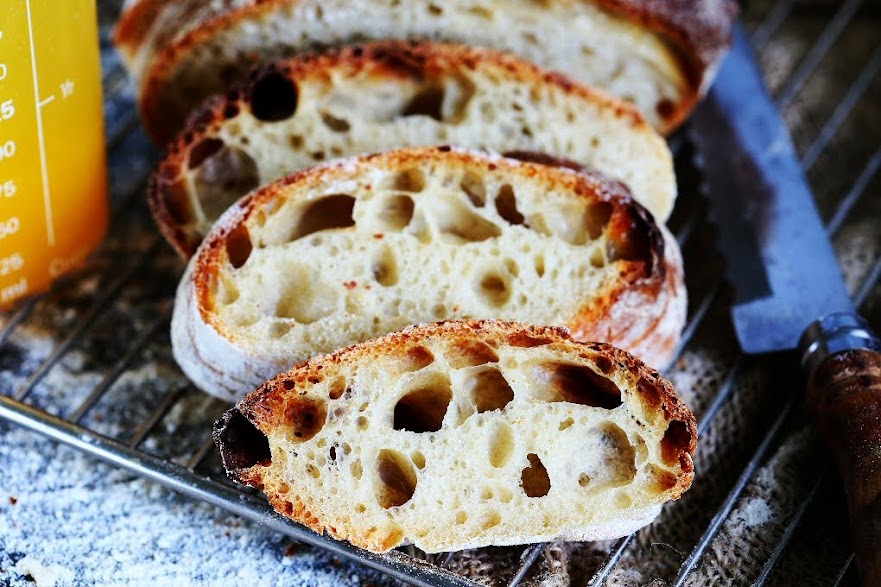
Ciabatta dough is wet and sticky with hydration levels often 80% or higher up to 95%. So it can be tricky to handle the dough and obtain those signature air bubbles within the dough. The taste will be same regardless of the crumb of your bread. Here are some very helpful tips on how to handle high hydration dough.
The soft, chewy texture and big, distinctively airy holes make ciabatta perfect for dunking into soups, sopping up sauce or absorbing seasoned oil. From breeding yeast water to the loaf of bread, it takes about 7 days. A slow and long process, but the result is definitely worth your time and patience.
Wild Yeast Ciabatta using Yeast Water and Bassinage Method
adapted from Marcel Paa| Cultivating Yeast Water | Refreshing Yeast Water | Dough |
|---|---|---|
|
|
|
| Cultivating Yeast Water | |||
|---|---|---|---|
 |
 |
 |
 |
| Refreshing Yeast Water | ||
|---|---|---|
 |
 |
 |
| For the Dough | ||||
|---|---|---|---|---|
 |
 |
 |
 |
 |
- To cultivate wild yeast water : Use hot water to rinse the bottle and pour in the 250 ml warm water. Then add the honey and finally the dried fruit. Depending on the type of dried fruit, cut it into small pieces so that it comes out of the bottle after swelling. Shake the bottle until the honey has dissolved and close the bottle with a balloon or a latex glove. Leave the bottle at room temperature for 4-5 days. During these days, shake the bottle a little every now and then so that new oxygen gets in.
- To refresh the yeast water : To do this, put the wild yeast water, warm water, honey and sultanas in a glass bottle and close it tightly. Shake the bottle to mix all the ingredients. Replace the bottle cap with a balloon. Leave it to ferment at room temperature for 12-24 hours.
- To prepare the dough : After 12-24 hours, the sultanas float on the yeast water and this means that it's strong enough to ferment the dough.
- Carefully remove the balloon from the bottle and pour the yeast water through a sieve into the mixing bowl of your mixer. Add in the remaining ingredients and knead for 2-3 minutes on slow speed.
- Increase the mixer speed and knead the dough for about 8-10 minutes at medium speed until it passes the "window test". Gradually fold the second part of water into the dough until the dough has completely absorbed the liquid.
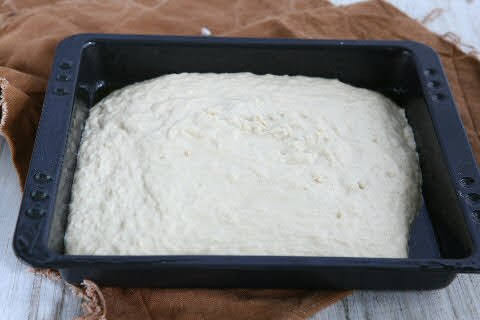
- In a lightly greased rectangular container, place the dough and cover with a plastic film. Leave it to rest for 12-16 hours at room temperature.
- During that time, stretch and fold the dough 2-3 times. To do this, dip your hands in a little water beforehand, then pull the dough up slightly on one side and place it on the opposite side of the container. Repeat this process from all four sides. Then cover the dough again and let it rest.
- After the proofing time, turn the dough out onto a generously floured work surface and divide into two equal portions. Pull the dough towards the conter from each side to form a "slipper". Place it on a generously floured tea towel on a baking tray with the seal facing upwards. Cover the dough with the towel and leave to rise for 40 minutes at room temperature.
- Preheat the oven to 230C/450F with a baking stone in the middle of oven and a baking tray at the bottom.
- Place the dough, with the seal side down, on a floured bread shovel and push them directly onto the baking stone in the oven. I simply turned the dough onto a well floured parchment paper and place it directly onto the baking stone. Pour a glass of water into the baking tray at the bottome of the oven and close the oven door immediately.
- Now reduce the oven temperature to 220C/430F and bake the loaves for 15 minutes. Now open the oven door to let the steam escape and then bake the loaves for another 25 minutes until crispy. Cool the loaves on a wire rack.

© 2022 | http://angiesrecipes.blogspot.com

© 2022 | http://angiesrecipes.blogspot.com
 © 2022 | http://angiesrecipes.blogspot.com

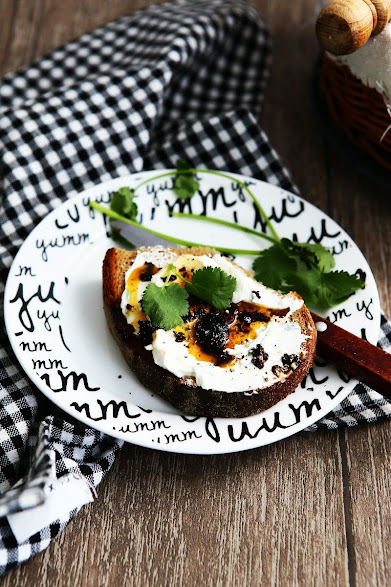
Poppy Bread with Pasta Madre Starter
 © 2022 | http://angiesrecipes.blogspot.com
 © 2022 | http://angiesrecipes.blogspot.com
 |
 |
 © 2022 | http://angiesrecipes.blogspot.com

© 2022 | http://angiesrecipes.blogspot.com
Pasta Madre (meaning ‘dough mother’ in Italian and has nothing to do with pasta), aka Lievito Madre (mother yeast), is a stiff sourdough starter, more like a dough which is widely used across Italy and favoured for both its active nature, mild flavour profile (no sour flavour) and ability to leaven egg and dairy-enriched doughs, like panettone, an Italian holiday cake that is eaten during the Christmas season. Check out here or here, if you want to learn more about this Italian mother yeast-Lievito Madra.
Last, but not the least, if you already have a liquid sourdough starter with 100% hydration at home, you can easily convert it to the solid pasta madre. Take out your liquid sourdough starter of 100 % hydration and leave it to come to room temperature (22C-24C / 72-75F) and give it 2-3 hours. Now you can start feeding the starter with a feeding ratio - 2:2:1 (2 parts liquid starter, 2 parts flour, 1 part water). For example, 20 g starter + 20 g strong flour + 10 g water. Feed 2 times every 5 hours, or until it doubles in size. You can also leave it in the fridge overnight, just feed the starter before going to bed and feed again in the morning. Repeat the process for 2 days or 3 days if making enriched breads.
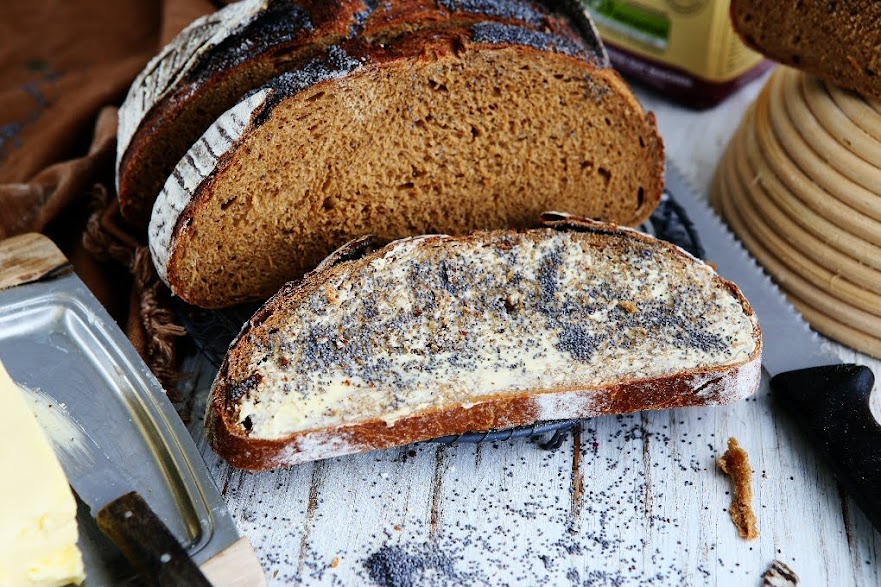
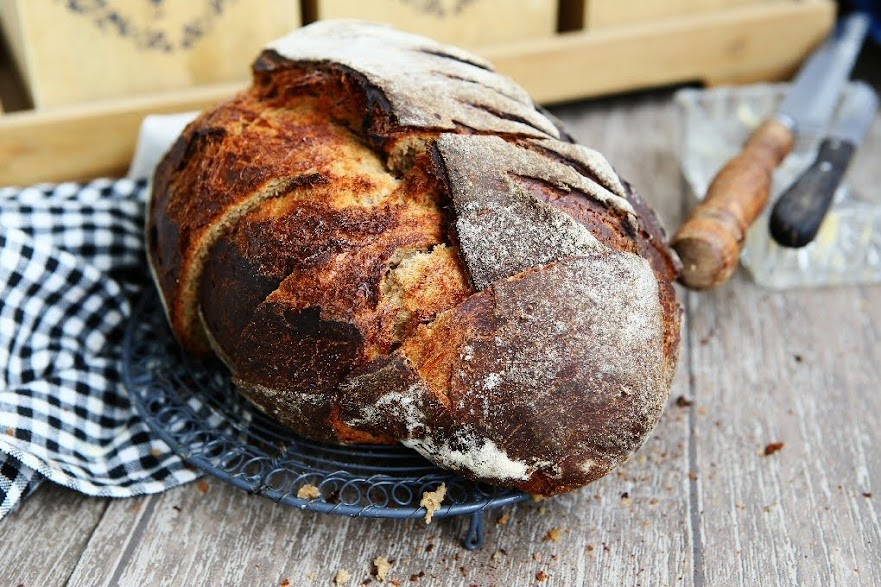
Roggenmischbrot German Mixed Rye Bread with Honey
 © 2022 | http://angiesrecipes.blogspot.com
 |
 |
 © 2022 | http://angiesrecipes.blogspot.com
 © 2022 | http://angiesrecipes.blogspot.com
One of the great pleasures of living in Europe is the wide array of breads in various forms, tastes, textures and colours available. Healthy rye bread is gaining popularity because of its wholesomeness, high nutritional value and may be more beneficial in weight loss than wheat. Breads made with rye flour have a longer shelf life and taste fresh longer than breads made with wheat flours. It is also often combined with other flours because of its low protein / gluten content.
Many so-called rye breads are actually a mixture of rye and wheat, or some other grain that’s easier to work with. Rye bread in Germany, according to the law, must be made with no less than 90% rye. Any bread with a lower percentage of rye flour is called Mischbrot, either Roggenmischbrot / mixed rye bread or Weizenmischbrot / mixed wheat bread.
Rye flour is darker than wheat flour and it has higher amounts of vitamins B and E. Earthy, tangy rye bread is often made with additions like honey, malt syrup, or cocoa powder, which add colour, aroma and flavour. Very often bread seasoning / bread spice / Brotgewürz, like caraway, dill, fennel, anis, coriander, or cardamom, is added to the dough according to personal or regional preference, and they make the bread particularly tasty, aromatic and also aid digestion.
While you can make bread with 100% rye, which is difficult to work or knead and the crumb tends to be denser, heavier and tighter, though taste more distinctly of rye, very digestible and nutritious if made as a sourdough. That means it needs a lot of help if you aim to get a fluffy, airy product. One of commen practices is the addition of some wheat flour. Wheat flour can be added in any ratio that suits your taste and liking to help form a better gluten structure and get a good rise but still keeps good rye flavour and aroma.
Light and soft inside with a very crunchy crust, this bread is a great choice for corned beef, roast beef, or pastrami sandwiches slathered with grainy mustard and topped with cheese. It freezes very well too. Wrap it in plastic wrap and aluminum foil, then store in a freezer bag for up to three months. Thaw at room temperature and reheat in the oven if desired.
Rye Mix Bread with Honey
inspired by Roggen-Krustenbrot mit Honig
|
- In the mixing bowl of your table mixer fixed with a dough hook, add rye flour, bread flour, sourdough, honey, and fresh yeast. Mix at slow speed while you slowly add in water until the ingredients roughly come together. Increase the speed to medium and stir for 5 minutes. Now add in salt and continue to mix for a further 2 minutes until the a firm dough forms.
- Turn out onto a work surface and shape into a ball. Grease the mixing bowl with a bit of olive oil and return the dough ball to the bowl. Cover with a plastic wrap and let it rise in a warm, moist environment until double in volume.
- Fold the edges of the dough inwards several times and let the dough rise again for 1 hour.
- Lightly flour your work surface and gently shape the dough into an oval batard or round ball. Place the shaped dough into a well floured bread basket with the seam sides up. Cover the dough with a slightly moist kitchen towel and let rise for about an hour.
- Meanwhile preheat the oven to 240C/470F with a pizza stone on the 2nd bottom rack and a baking tray at the bottom.
- Turn the puffy dough onto a floured parchment paper or the floured back of a baking sheet. Use a sharp knife, razor blade, or bread lame to score a couple of lines across the dough. (here is a scoring tutorial just in case you are interested) Place the dough onto the pizza stone and throw a few ice cubes into the baking tray at the bottom to generate some steam.
- Close the oven door immediately and bake the bread for about 15 minutes. Lower the oven temperature to 210C/410F and bake for 30-35 more minutes until the bread crust is deep golden brown. Remove and cool the bread on a wire rack.

© 2022 | http://angiesrecipes.blogspot.com

© 2022 | http://angiesrecipes.blogspot.com

© 2022 | http://angiesrecipes.blogspot.com
© 2022 | http://angiesrecipes.blogspot.com


