
Crispy Pork Belly with Basic Mole
 © 2022 | http://angiesrecipes.blogspot.com
 |
 |
 © 2022 | http://angiesrecipes.blogspot.com
Earthy, intense and rich Mole (pronounced moh-leh) is most representative of Mexican cuisine. The word Mole derives from the language of the Aztecs, molli (or mulli), which just means “sauce,” Mole is generally a thick, dense sauce, ranging from red to green to black, and should never be runny. There are hundreds of variations of mole in Mexico, depending on where you are and the season.
This basic (not exactly authentic, but delicious all the same) mole sauce is made by toasting and combining some dried chillies (guajillo chillies, Kashmiri red chillies, ancho chillies) spices (cinnamon, anise, coriander, cayenne, cardamom), dark chocolate, herbs (oregano, thyme and cilantro), thickeners (old bread, nuts or/and seeds) and homemade broth. Serve it as a main course with savoury, rich, crunchy pork belly, melt-in-mouth pulled pork and juicy, tender chicken or spoon over tacos and enchiladas. Once you’ve made the sauce, you can use it for practically anything. Pork belly is a staple at our dinner table and paired with the rich, complex mole sauce is literally heaven on earth.
| Pork Belly | Basic Mole |
|---|---|
|
|
- Place the pork belly in your slow cooker, add in spices, and salt. Fill the slow cooker with water. Cook for 3-4 hours on high. The pork belly should be tender, soft, but not fallapart. Remove the pork belly to a tray or plate and cool completely. I usually leave it in the fridge, uncovered, overnight, so the skin dries up. Reserve the broth.
- Poke lots of little holes on the pork belly and cut into 4 squares or any desired sized pieces. Season with more salt and pepper. Place them in the basket of your air fryer and cook for 15 minutes at 180C/350F. Increase the temperature to 200C/400F and cook for a further 3 minutes until the pork skin is golden, crispy and puffed up.
- Preheat the oven to 200C/400F. Place all the dried chillies to the aluminum foil–lined baking tray and toast, turning once, until dark and fragrant, about 3 minutes. Place peanuts, pumpkin seeds, bread pieces, and spices in another tray and set it at the bottom of the oven.
- Meanwhile, fill a medium saucepan with 500 ml of reserved broth. Set the saucepan over low heat. Transfer toasted chillies to the saucepan with broth. Remove another tray with peanuts, bread and spices and add all the ingredients to the saucepan too.
- Heat the ghee, butter or lard in a skillet over medium-high heat. Add in chopped shallot and stirfry for a couple of minutes. Add in crushed garlic cloves and fry for just a few seconds. Stir in raisins and herbs. Transfer the whole mixture together with the honey to the saucepan too. Bring the mixture to a gentle boil and remove from heat. Purée the mixture using a stick blender to make a smooth thick mole.
- Transfer the mole to a large skillet. Add in dark chocolate and enough of broth to allow the mixture to blend. Process until completely smooth.
- Cook the mole sauce over low heat for 10 minutes until it thickens, stirring frequently. Add in more garlic honey and/or broth as needed.
- Spoon some mole sauce on serving plates, arrange crispy pork belly over mole sauce and garnish with crushed peanuts and chopped cilantro.

© 2022 | http://angiesrecipes.blogspot.com
 |
 |

© 2022 | http://angiesrecipes.blogspot.com

© 2022 | http://angiesrecipes.blogspot.com
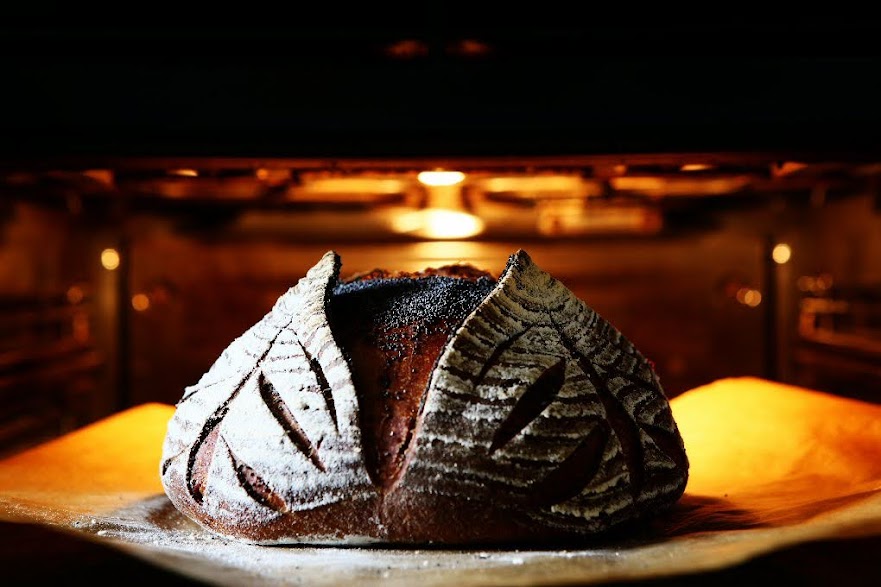
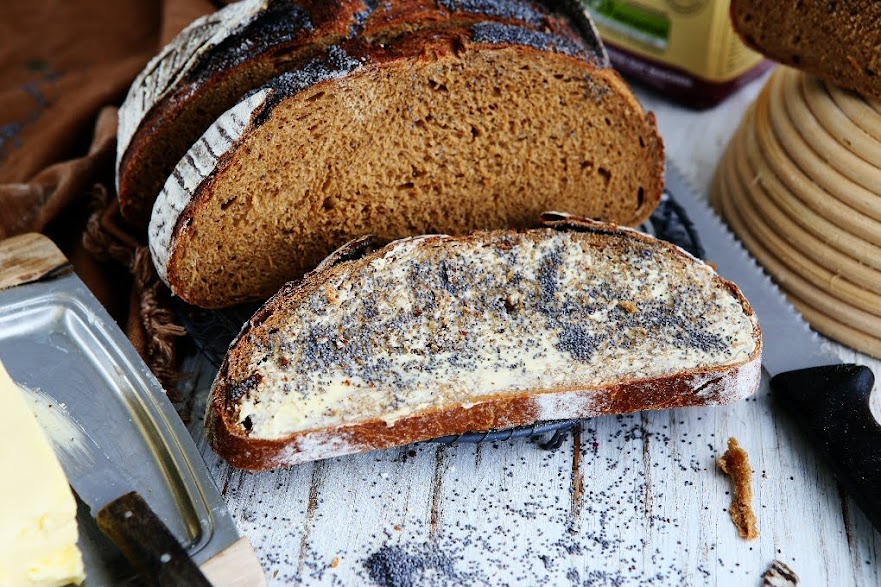
Poppy Bread with Pasta Madre Starter
 © 2022 | http://angiesrecipes.blogspot.com
 © 2022 | http://angiesrecipes.blogspot.com
 |
 |
 © 2022 | http://angiesrecipes.blogspot.com

© 2022 | http://angiesrecipes.blogspot.com
Pasta Madre (meaning ‘dough mother’ in Italian and has nothing to do with pasta), aka Lievito Madre (mother yeast), is a stiff sourdough starter, more like a dough which is widely used across Italy and favoured for both its active nature, mild flavour profile (no sour flavour) and ability to leaven egg and dairy-enriched doughs, like panettone, an Italian holiday cake that is eaten during the Christmas season. Check out here or here, if you want to learn more about this Italian mother yeast-Lievito Madra.
Last, but not the least, if you already have a liquid sourdough starter with 100% hydration at home, you can easily convert it to the solid pasta madre. Take out your liquid sourdough starter of 100 % hydration and leave it to come to room temperature (22C-24C / 72-75F) and give it 2-3 hours. Now you can start feeding the starter with a feeding ratio - 2:2:1 (2 parts liquid starter, 2 parts flour, 1 part water). For example, 20 g starter + 20 g strong flour + 10 g water. Feed 2 times every 5 hours, or until it doubles in size. You can also leave it in the fridge overnight, just feed the starter before going to bed and feed again in the morning. Repeat the process for 2 days or 3 days if making enriched breads.
White Asparagus with Sriracha Hollandaise
 © 2022 | http://angiesrecipes.blogspot.com
 |
 |
 © 2022 | http://angiesrecipes.blogspot.com
Unlike the green variety, white asparagus must be peeled before cooking and the woody base should also be removed as it is too stringy and hard to chew. Peel and boil the white asparagus for this simple and yummy recipe, then serve those “White Gold” with an easy blender Hollandaise spiked with sriracha sauce. If you are in a hurry, simply serve them with melted butter.
Hollandaise sauce, one of the 5 French mother sauces (Béchamel, Velouté, Espagnole, Hollandaise, and Tomato), is an emulsion of egg yolk, melted butter, and lemon juice. Despite having “Holland” in its name, Hollandaise sauce was first born in France and was originally known as Sauce Isigny, named after Isigny-sur-Mer, a small town in Normandy famous for its butter and cream. When Normandy’s dairy production was shut down during World War I, the sauce was renamed “Hollandaise” to reflect the usage of imported Dutch butter.
| Sriracha Hollandaise | |
|---|---|
|
|
- Bring a stockpot of water to a boil, add the salt, the sugar and the butter. Meanwhile peel the white asparagus and cut off the woody bottom ends.
- Place the peeled white asparagus in the boiling water and cook for 12-15 minutes until al dente. Melt the butter over a low flame until it begins to bubble. Remove from heat.
- In a wide mouth mason jar, add egg yolks, lemon juice, cayenne pepper and sea salt. Blend the ingredients with your immersion blender while slowly adding the melted butter, a couple of tablespoons at a time, to the jar. Blend as you gradually add in butter, moving the immersion blender up and down. The sauce should thicken in just a minute or two.
- Season the Hollandaise with sriracha or your favourite chilli sauce. Whisk until combined. Taste and add more sriracha if desired for more heat.
- Drain the white asparagus and arrange on plates with spicy Hollandaise sauce on a bed of thinly sliced heirloom tomatoes if using, and garnish with chopped parsley and chilli rings.

© 2022 | http://angiesrecipes.blogspot.com
 |
 |

© 2022 | http://angiesrecipes.blogspot.com
Harissa Honey Chicken Lollipops
 © 2022 | http://angiesrecipes.blogspot.com
 |
 |
 © 2022 | http://angiesrecipes.blogspot.com
This particular chicken lollipop recipe is a Indo-Chinese favourite appetizer where frenched chicken wings are marinated, baked (or fried) until crisp and tossed with a sticky sweet and hot sauce (harrissa honey sauce). Simply put, chicken lollipops are the fried chicken wings but with a more distinct look and spicy flavour.
The name “chicken lollipop” is referring to how the chicken wings look after trimming. To achieve the lollipop appearance, the meat on the chicken wing is cut loose from the bone end and pushed down, a culinary technique known as “frenching.”
The recipe is actually very simple. The hardest part of the recipe is to form the chicken lollipops from chicken wings. If you plan to make a huge batch for a crowd, fry the chicken lollipops and make the sauce in advance. Then you can re-crisp the wings at a high temperature for a couple of minutes, re-heat the sauce, and toss to coat just before serving.
Here is a video on how to cut lollipops from the wings that I found on youtube.
| Harissa Sauce | |
|---|---|
|
|
 |
 |
 |
 |
 |
 |
- Divide the chicken wing into 3 parts (drumette, winglet and wingtip) by slicing through the joints. Save the wingtip for other uses.
- French the drumette. Holding the drumette (which looks like a chicken drumstick) by the meaty end, use a small, sharp knife to cut around the thin end of the drummette so the meat and skin are released from the bone. Push the meat down towards the fat end to create a lollipop.
- French the winglet / flat. For the winglet, which contains two bones, cut the joint where the bones meet. Trim a small section of the meat from the circumference of that area to expose the bones. Remove one of the bones and push the meat to the end of the remaining bone to form a lollipop.
- Transfer the prepared wings to a medium bowl. Add in ground cumin, coriander, garlic powder, cayenne pepper, salt and pepper. Rub the spice mixture into the wing pieces until there is no powder left in the bottom of your bowl. Cover and refrigerate for at least 1 hour, up to overnight.
- Preheat your oven to 200C/400F and brush a baking tray with some olive oil. Arrange the chicken wings on the tray and bake in the middle of the oven for 35 minutes or until the chicken is nicely browned and slightly charred, and completely cooked through.
- Bring sauce ingredients slowly to a simmer in a saucepan on the stovetop while your wings are baking. When the sauce starts to bubble, turn off the heat and set aside for 5 minutes. The sauce will thickens up after cooling a bit. Toss the wings in the sauce until thoroughly coated. Serve on a bed of fresh herbs and garnished with pomegranate seeds and chopped spring onions if desired.

© 2022 | http://angiesrecipes.blogspot.com

© 2022 | http://angiesrecipes.blogspot.com

© 2022 | http://angiesrecipes.blogspot.com
Jumbo Strawberry Buttermilk Muffins
 © 2022 | http://angiesrecipes.blogspot.com
 |
 |
 © 2022 | http://angiesrecipes.blogspot.com
 © 2022 | http://angiesrecipes.blogspot.com
Bursting with fresh, plump and sweet local strawberries, these fruity oversized muffins are soft, tender and make a perfect summer dessert or a delightful breakfast treat with coffee. They bake tall and moist just like the ones you get at your favourite local bakery. Buttermilk adds pleasant tanginess to baked goods, and like yoghrt and sour cream, it also helps tenderize gluten, giving baked goods a softer texture and more body. For an easy substitute of buttermilk, measure one tablespoon of lemon juice into one cup of milk and let sit for 5 minutes.
If you don't have a jumbo muffin tin, then use a regular 12-cup muffin pan and adjust the baking time to 15-18 minutes. You can substitute the strawberries for any seasonal fruit, or even chocolate chips!
Wild Garlic Pullman Sandwich Loaf
 © 2022 | http://angiesrecipes.blogspot.com
 |
 |
 © 2022 | http://angiesrecipes.blogspot.com

© 2022 | http://angiesrecipes.blogspot.com
Blooming Ramsons

© 2022 | http://angiesrecipes.blogspot.com
For this sandwich bread, a pullman pan, which is basically a loaf pan with a cover, is best for creating the beautiful pain de mie sandwich bread. But if you don’t have a pullman pan, feel free to use a regular loaf pan. Either way the bread will be amazingly delicious.
The beautiful garlic-scented plant is currently in season here and I am going to incorporate that into the rectangular pain de mie bread by adding gently wilted green leaves together with crisp fried onions to the dough. A fun foraging treat that's great for breakfast toasts, sandwiches, French toast or garlic croutons. Of course you can buy wild garlic / ramps in the supermarket or farmer market, but it’s undeniably more satisfying to cook or bake with something that you’ve actually found in the woods.
100% Rye Banana Bread
 © 2022 | http://angiesrecipes.blogspot.com
 © 2022 | http://angiesrecipes.blogspot.com
 |
 |
 © 2022 | http://angiesrecipes.blogspot.com
Spiced with cinnamon, nutmeg, and aromatic cardamom and sweetened with coconut sugar and honey, this deep-dark quick rye bread with a super moist and tender texture and lots of banana flavour is a hearty and healthy take on a regular banana bread recipe. It's filled with 100% nutritious, earthy rye flour and is free from refined sugar. With a combination of over-ripe banans, aromatic warming spices, good quality honey and earthy rye flour, this bread guarantees great taste experiences. Be sure to use really ripe bananas - the more dark brown spots on the skin, the better.
Rye is a close relative of both wheat and barley. It has a deep, rich taste and is packed with vitamins, minerals and soluble fiber. Rye has been linked to a reduced risk of cardiovascular disease, colon cancer, breast cancer and diabetes.
100% Rye Banana Bread
adapted from Kingarthurbaking
|
- Preheat the oven to 160C/325F. Lightly grease or line a 9-10" x 5" / 24-26 cm x 12cm loaf pan with parchment paper.
- In a large bowl, beat the butter, coconut sugar, vanilla paste, spices, baking powder, baking soda, and salt until smooth.
- Add the mashed banana, honey, and eggs. Mix until combined. Add the flours, stirring just until combined and smooth.
- Spoon the batter into the prepared pan, smoothing the top. Cut a whole banana in half lengthwise and lay the two halves, cut side up, atop the loaf.
- Bake the bread for 60 to 70 minutes, or until a long toothpick or skewer inserted into the center comes out clean, or with a few wet crumbs clinging to it.
- Remove the bread from the oven and allow it to cool for 10 minutes in the pan. Turn the bread out of the pan, and cool completely on a rack.

© 2022 | http://angiesrecipes.blogspot.com

© 2022 | http://angiesrecipes.blogspot.com
 |
 |

© 2022 | http://angiesrecipes.blogspot.com


