 © 2025 | http://angiesrecipes.blogspot.com
 |
 |
 © 2025 | http://angiesrecipes.blogspot.com
Creating bread from rice or rice flour is not a new culinary concept. My mom ususally steamed them after overnight proof using very little yeast or wild yeast. Had it at home all the time, I didn’t and still don’t give a toss about it. So, this is for you, Dezzy. However, using 100% whole raw rice kernels to bake gluten free bread without the help of psyllium, xanthan gum or starch can be a bit tricky and time-consuming than simply using rice flour. The rice batter tends to dry out very easily, that’s part of reasons that rice must be soaked for at least 4 hours, preferably overnight, and esp. if you don’t own a high-speed blender. For a better result, use short grain white rice, but long grain rice could and should work too. The result could be different though. Make one large loaf or several small ones. Top the loaf/loaves with some seeds for different flavours if desired. It’s crusty outside and very soft and tender inside, ideal for sandwiches and for toasting.
Blender Short Grain Rice Bread
adapted from Einfach Backen and Emmy
|

 |
 |
 |
 |
 |
 |
- To make the dough, soak the rice with plenty of cold water for at least 4 hours or overnight in the fridge.
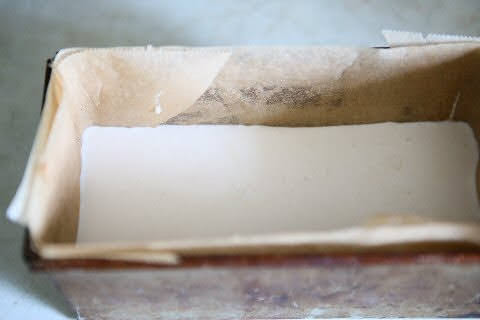
- Grease or line a 24cmx10cmx9cm loaf pan with baking paper or grease several smaller loaf pans.
- Pour the rice through a sieve, rinse briefly with cold water and place in a high-speed blender. Add room temperature water, maple syrup and melted coconut oil and blend on the highest setting for 2 minutes until the batter is silky smooth and warm. The batter looks very much like marshmallow cream.
- Add the instant yeast and blend for 35 seconds until combined. Pour the bread batter into the prepared pan. The batter should fill the pan 1/3, not more than 1/2 of the height. Cover with a clean towel and set aside on your counter for 30 minutes.
- Place an oven safe tray filled with some water at the bottom of oven and preheat to 100C/210F. Place the pan in the middle of hot oven and increase the temperature to 190C/375F and bake for 45-50 minutes until golden brown.
- Leave the bread to cool for 5 minutes before turning it out on a wire rack to cool completely before slicing. The bread will keep for at least 3 days in an airtight container at room temperature.

© 2025 | http://angiesrecipes.blogspot.com

© 2025 | http://angiesrecipes.blogspot.com

© 2025 | http://angiesrecipes.blogspot.com

I don’t think I have ever had rice bread. Looks good though.
ReplyDelete...Angie, this new for me.
ReplyDeleteMe encantaría probar este pan, ahora no puedo comer trigo y estoy segura que esta opción me gustará mucho.
ReplyDeleteThat looks really tasty and healthy :-D
ReplyDeleteThank you for this recipe-saving it to my pinterest gf board thank you
ReplyDeleteOoooh, it turned out so great, bet it was soft as heavens. I have never tried to make it, but always admired it over at different YouTube channels. I do not mind the soaking overnight, I do that with lentils all the time, but during the day I do not have the time to wait for the dough to rise twice, not even once, so that is why I never made it, but would eat up the whole loaf that you made LOL I have heard that what can create a problem is if the mixture gets too hot in the blender during the long process of mixing, so it needs to go slow apparently.
ReplyDeleteIt looks so tastey! But I have feeling I couldn't have it due to my blood sugar. Although, it looks so rewarding from the work you put into it. Awesome!
ReplyDeleteLooks amazing for breakfast!
ReplyDeleteAwesome bread! Looks very yummy 🌸❤️💕
ReplyDeleteThis is really a fascinating bread . I'm printing off the recipe as I'd like to try it. Thanks for sharing Angie.
ReplyDeleteThat looks interesting. Never had it but have seen it.
ReplyDeleteThis sounds so easy and really interesting. I look forward to giving it a try. David (C & L)
ReplyDeleteLooks a delicious texture, wonderful!
ReplyDeleteGracias por al receta. Tomó nota. Te mando un beso.
ReplyDeleteI have never had rice bread, but I know that this is popular in countries like Japan...and is apparently very healthy and tasty as well. Thanks a lot for sharing this, Angie.
ReplyDeleteIt looks scrumptious
ReplyDeleteLooks good
ReplyDeleteWOW, that bread looks perfect!
ReplyDeleteThis is so intriguing and I hope helpful to people who need gluten free bread.
ReplyDeleteTandy (Lavender and Lime) https://tandysinclair.com
This is such a thoughtful and resourceful recipe, Angie. I appreciate how you made it feel approachable, especially for those of us avoiding gums and starches. It’s the kind of bread that feels both wholesome and nostalgic—definitely bookmarking this.
ReplyDeleteNew post: www.melodyjacob.com
I've never had rice bread before, but it sounds good.
ReplyDeleteHello Angie,
ReplyDeleteThe bread sounds yummy and healthy for me.
Take care, have a wonderful weekend.
Wow, does that look fantastic. I've never had rice bread!
ReplyDeleteSounds and looks healthy
ReplyDeleteNot something I've tried.
ReplyDeleteThank you for sharing the recipe.
All the best Jan
Angie, surely your recipe will turn out very well because the rice ferments, thus obtaining yeast. With it, sake is made, the alcoholic drink from Japan.
ReplyDeleteThis bread looks wonderfu! I think I have to try it...
ReplyDeletei am confused! when you say you don't give a toss about it ... do you mean you don't like rice bread?? but your recipe ...
ReplyDeleteSherry, I baked it for Dezzy who requested it a while ago in my another post. :-))
DeleteNow this is impressive! Using whole rice instead of rice flour takes gluten-free baking to another level. Love how crusty it looks, bet it makes amazing toast too.
ReplyDeletePut it in the toaster and let it brown before eating. It does take a while for it to brown but it’s worth the wait! Also, I slice it and freeze it because I can’t (okay, shouldn’t) eat it all before it goes bad.
ReplyDelete