
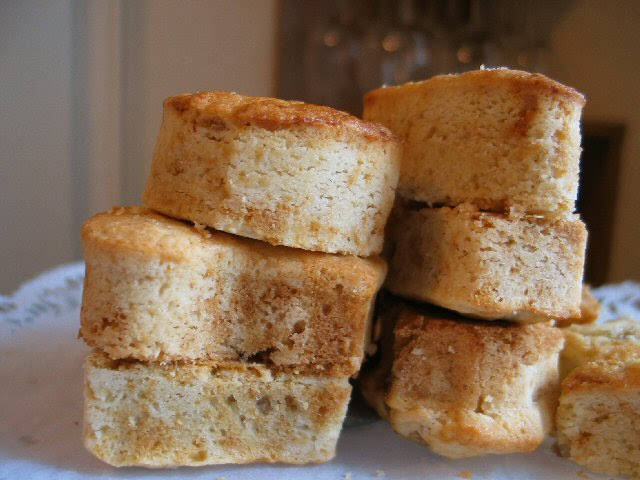
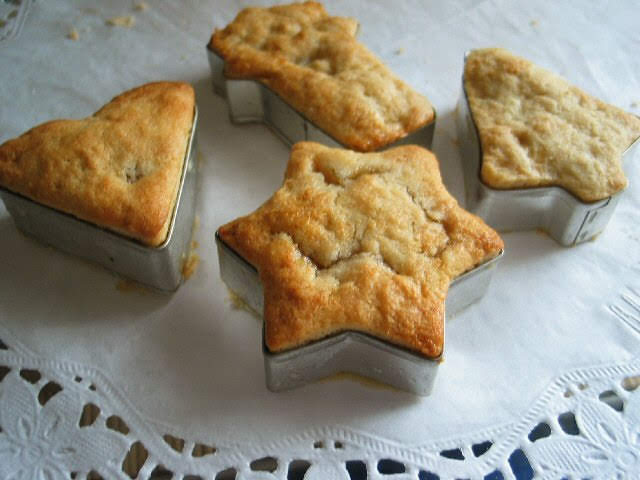
Taiwanese Pineapple Pastry
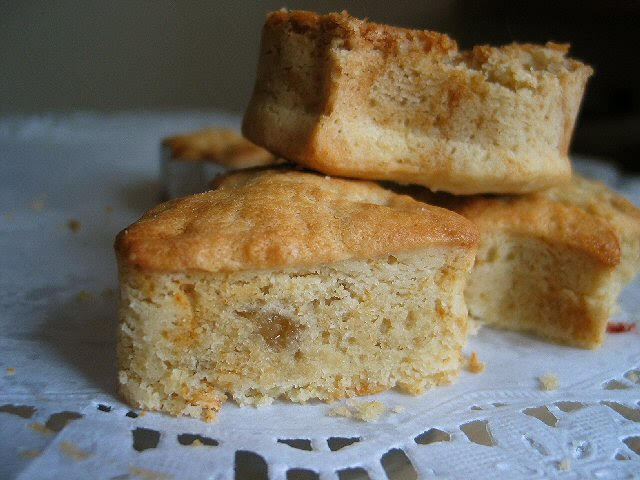

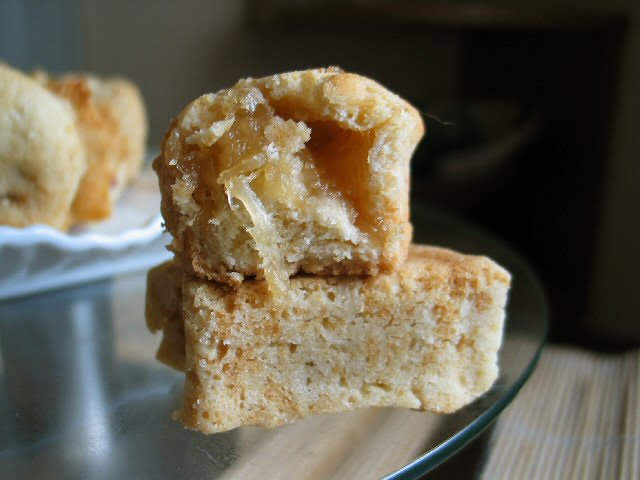
This is a very popular traditional Taiwanese dessert (凤梨酥, pronounced Feng Li Su) with a really yummy flaky pastry encased with a thick, not-too-sweet pineapple filling. Pineapple in Taiwanese or Hokkien means 'prosperous and thriving', they are therefore often given as a part of an engagement gifts, or simply as well-wishing presents around lunar Chinese New Year.
| Pastry | Filling |
|---|---|
|
|

 |
 |
 |
 |
- Drain pineapple well.Crush with a blender and place them in a skillet. Using medium heat, cook the drained crushed pineapple and sugar until most liquid has evaporated, and the filling turned golden. Stirring constantly using a wooden spoon to avoid burning. Set aside to cool.
- Beat shortening, butter and powdered sugar in a mixer until it turns light in color and fluffy. Gradually beat in whole egg and yolk until well combined. Sift in the flour and fold until just combined. Dissolve baking soda in the water and blend with the the mixture.
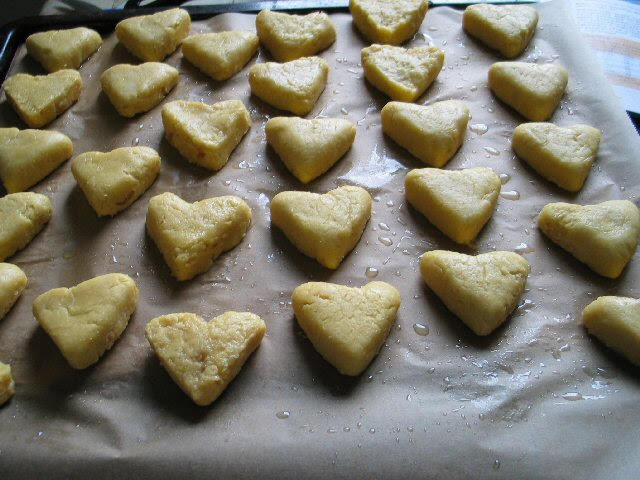
- Line baking trays with parchment paper. Divide the pastry dough and pineapple filling each into 28 equal rounds. Line work surface with large sheet of plastic wrap. Place and flatten the pastry dough on the plastic wrap with the palms and put the pineapple filling in the middle. and use the dough to cover the filling. Arrange it into moulds of your choice. Lightly draw the plastic wrap out of the mould, and turn the pastry onto the prepared tray. You can also grease the moulds and press the dough directly into the moulds. Bake in the preheated 170C/340F oven for about 22-25 minutes until light brown.


Cinnamon Walnut Rolls
 © 2020 | http://angiesrecipes.blogspot.com
 © 2020 | http://angiesrecipes.blogspot.com
 |
 |
 © 2020 | http://angiesrecipes.blogspot.com
Soft and fluffy cinnamon rolls filled with a buttery mixture of cinnamon, coconut sugar and walnuts and finished with a simple glaze. You can switch the walnuts for your favourite nuts or seeds or simply leave them out. So the choice is yours! They're best enjoyed warm with a cup of tea or coffee.
| Dough | Filling | Glaze |
|---|---|---|
|
|
|
- In the bowl of your stand mixer, whisk the flour, the sugar, salt, and dried yeast together. Set aside. In a small saucepan, heat the buttermilk and ghee / butter over low heat until the ghee is melted.
- Stir the liquid mixture into the flour mixture. Add the egg and mix with a dough hook at slow speed until the dough comes together. Increase the speed and knead until the dough is soft and elastic.
- Turn out the dough and shape into a ball. Lightly grease the mixing bowl with a bit of oil and return the dough to the bowl. Cover with a plastic film and let the dough rise until almost doubled in size, 1-2 hours.
- Turn out the dough and knead briefly. Roll the dough out into a rectangle, about 30cmx40cm. Spread the softened ghee / butter on top. Mix together the cinnamon, coconut sugar and chopped walnuts and sprinkle it all over the dough as evenly as possible.
- Divide the dough from the shorter side into 9 even strips and roll up each strip tightly. Place in a 25cmx30cm baking pan lined with baking paper and cover with a large piece of plastic wrap. Place it in the fridge for 8-12 hours.
- Two hours before baking, remove the dough from the fridge and let rise in a warm place until puffy. Preheat the oven to 190C/375F. Bake for about 25-28 minutes, until they are golden brown.
- Mix the powdered sugar, milk and vanilla together until smooth and lump free. Drizzle over the warm rolls and serve immediately. Store the leftover at room temperature for up to 3 days.

http://schneiderchen.de | © 2020 | http://angiesrecipes.blogspot.com
 |
 |

http://schneiderchen.de | © 2020 | http://angiesrecipes.blogspot.com

http://schneiderchen.de | © 2020 | http://angiesrecipes.blogspot.com

http://schneiderchen.de | © 2020 | http://angiesrecipes.blogspot.com
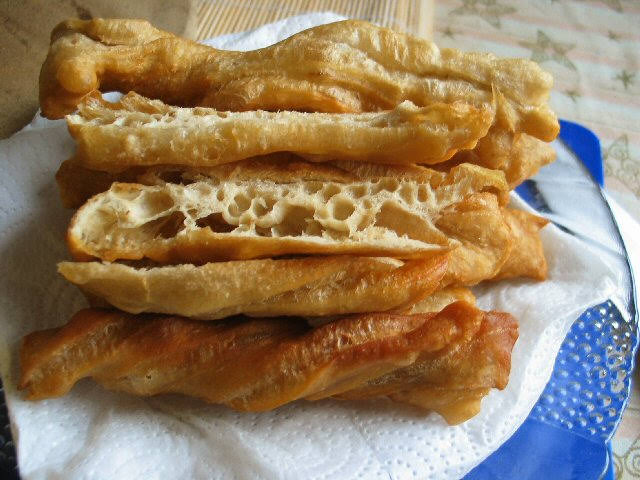
Sourdough Chinese Crullers and Jian Bing Guo Zi – Pancake Rolled With Yau Char Kwai


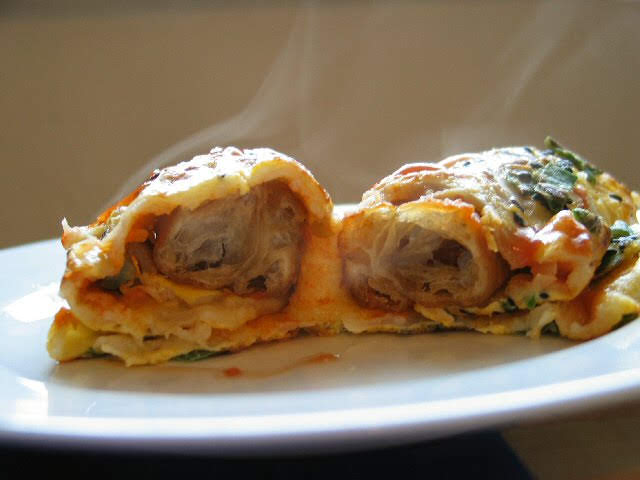
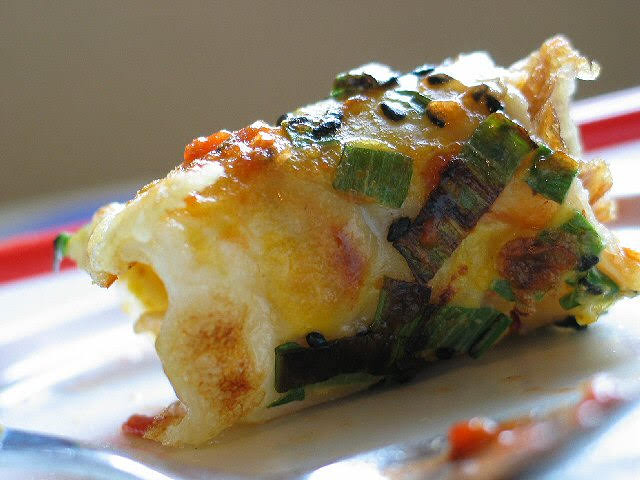
Jiānbĭngguŏzi (煎饼果子)is a typical Tianjin breakfast. Jiānbĭng, or "pancake" is prepared with egg and cooked on a skillet, then topped with a guŏzi (果子)(commonly called in Northern China) or Yau Char Kwai(used in Southern China) or fried dough stick, drizzled with scallions, sesame seeds and sauces and rolled up, like a wrap.
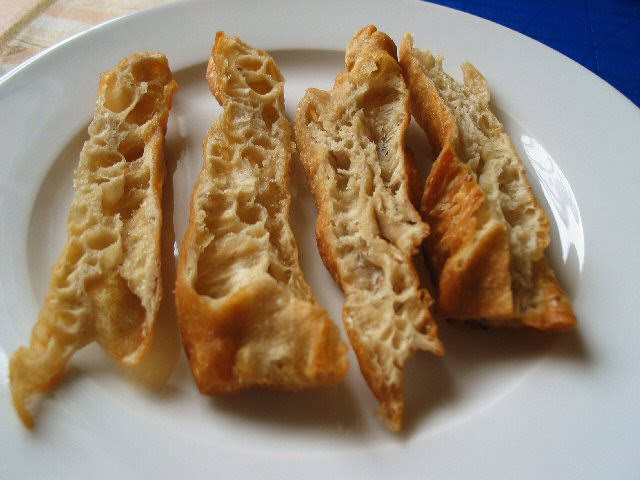
Sourdough Chinese Crullers - Yau Char Kwai
| Sponge | Dough |
|---|---|
|
|
- Combine first the starter, water in a bowl, and then stir in flour until a dough forms. Cover with a plastic wrap and set aside at room temperature for 12-18 hours. Whisk together ammonia, potassium carbonate, baking soda and baking powder in a bowl. Pour in water and blend all together.
- In a larger container, add in the sponge and flour. Pour in the mixture and stir them into a ball. Cover and allow to rest for 15 minutes. Set the dough on a greased work surface. Lightly press the dough into a flat rectangle and fold into three. Give it a quarter-turn to the right, cover and allow it to rest for another 15 minutes. Repeat folding and relaxing two more times. Now place the dough on a lightly oiled baking peel, press out the dough into a rectangle, about 5mm thick. Cover closely and chill overnight.
- Next morning, remove the dough from the fridge and divide the dough into 3x1-inch long strips. At the same time heat up a heavy skillet half-filled with frying oil until 180C/350F. Lightly press together two strips, which are overlappingly to each other, holding two ends closely and low them into the hot oil. Fry and turn the dough sticks until golden brown. Drain and cool slightly. These fried dough sticks are very often consumed with congee or soya drink
soya drink. Besides eating fried dough sticks with congee and soya drink, you can prepare a Jian Bing Guo Zi (Fried Dough Stick Wrap), a traditional breakfast in Tianjin and Beijing.


Jian Bing Guo Zi – Pancake Rolled With Yau Char Kwai
|
|
- Mix together flours, water and salt until you have a well-combined and lump free mixture. Heat up a skillet, and brush with a bit of oil. Scoop 3-4 tablespoons of batter into the skillet. Tilt the pan with a circular motion so that the batter coats the surface evenly.
- Pour 1/3 of egg over, sprinkle chopped scallions and sesame seeds. Cook the batter for 1-2 minutes. Turn and cook the pancake until golden brown. Place it on a serving plate and brush with the sauces. Center the Yau Char Kwai and wrap up. Repeat with the rest of the batter and egg.


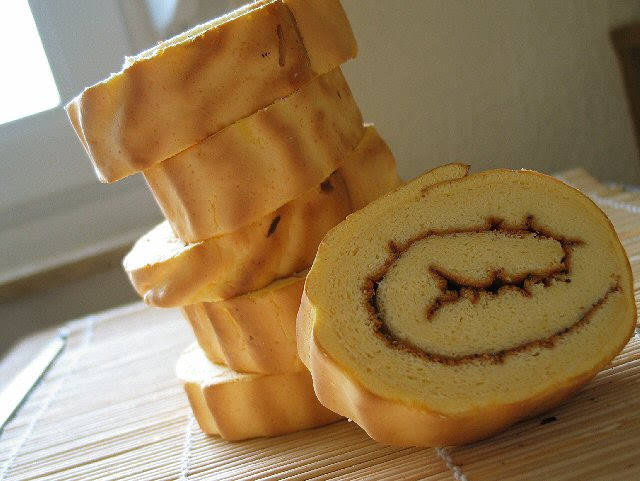
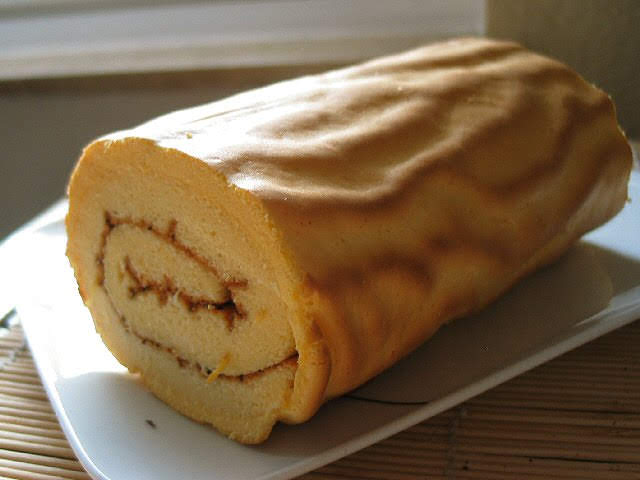
Tiger Stripe Swiss Roll

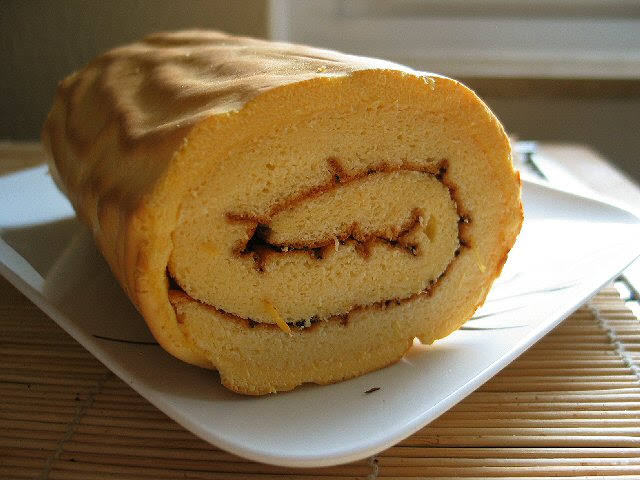

A chiffon roulade with the tiger-stripe pattern on the skin....you can, of course, leave the skin out, as this light chiffon roll tastes good of its own.
| Swiss Roll | Tiger Stripe |
|---|---|
|
|
- Preheat the oven to 190C/375F. Line a 34cmx25cm rectangular baking tray with paper. Sift the flour, cornstarch, and baking powder into a bowl. Separate the eggs. Stir orange juice and sweetened condensed milk in another bowl, gradually beat in the corn oil until fully combined and emulsified.
- Sift in the flour mixture, mix roughly and then add in egg yolks and vanilla extract. Mix until incorporated. Beat the egg whites on medium speed, sprinkle in the salt once once combined. Continue to beat the egg whites until foamy. Add in lime juice and whip the mixture until soft peaks form. Beat in sugar in 2 additions until the stiff peaks appear.
- Fold the meringue in 3 additions with the yolk batter until incorporated and smooth. Pour the batter into the prepared baking tray and smooth the surface. Bake the cake on the upper rack in the oven for about 20 minutes. Remove the cake and sift some powdered sugar on the surface. Place a parchment paper on the top and then a baking sheet. Turn the tray upside down to unmold the cake. Remove the baking tray and peel away the lining paper. If you prefer to have golden side rolled in, then flip the cake or you can leave this step away. Trim the edges off and set aside, covered with a towel, to cool for about 10 minutes. Fill the cake with butter cream or jam and roll up. Store the cake in the fridge while preparing the tiger stripe.
- Preheat the oven to 200C/400F. Place all the ingredients in the mixing bowl and beat at medium-high speed until the volume of mixture has doubled and the colour turned lighter. Pour the batter into a baking tray lined with the paper. Bake in the upper rack of the hot oven for 6-8 minutes until the surface has turned into the golden browned tiger stripes. Remove and turn it on another baking paper. Tear the lining paper off and trim the sides. Spread a layer of the whipped cream or jam over, and then put on the chiffon Swiss roll. Gently roll it up and cool it covered in the fridge for 1 hour before serving.


 |
 |
Cumin-flavoured Beef Wonton Soup
 © 2020 | http://angiesrecipes.blogspot.com
 © 2020 | http://angiesrecipes.blogspot.com
 © 2020 | http://angiesrecipes.blogspot.com
The wonton, also spelled wantan, wanton, or wuntun, is a type of Chinese dumpling. They are made with a thin wrapper filled with tender, juicy seasoned ground meat or seafood and are available in steamed, deep-fried or in soup with or without noodles.
| Filling | |
|---|---|
|
|

 width="150px" height="120px"/>
 |
 |
 |
 |
 |
 |
 |
- For filling, combine all ingredients except water in a bowl. Gradually add in water and mix with chopsticks until all the ingredients are well-blended and smooth.
- Position wonton skin with one point towards you. Spoon 1 rounded teaspoon of filling just below center of skin. Fold bottom point of skin over the filling. Roll up skin and filling, leaving 1 inch at the top of skin. Moisten the edges of the triangle and bring both points of the triangle base towards the center to form a wonton shape.
- Bring some water to a boil. Drop 20 wontons one at a time. Simmer
angiesrecipes, uncovered about 3-5 minutes until the wonton float. Freeze the rest of uncooked in airtight containers. Boil directly from frozen for 6 to 8 minutes.
- At the same time, bring the broth, salt and carrot julienne to boiling in a saucepan. Place some wonton in the bowls and add in preserved cabbage, seaweed and green onion. Ladle the soup into bowls and drizzle with sesame oil. Enjoy!
 © 2020 | http://angiesrecipes.blogspot.com
 © 2020 | http://angiesrecipes.blogspot.com
 © 2020 | http://angiesrecipes.blogspot.com
Olive Chia Seed Sandwich Loaf
 © 2020 | http://angiesrecipes.blogspot.com
 |
 |

http://schneiderchen.de | © 2020 | http://angiesrecipes.blogspot.com
A very aromatic, soft and easy to make sandwich loaf flecked with chopped black olives and chia seeds. This bread will be a hit if you love olive and it’s perfect for sandwiches, canapés and as a great addition to your bread basket on the dinner table.
|
- Lightly grease a 9cm-deep, 11 x 22cm loaf pan with olive oil and line with baking paper.
- Combine flour, yeast and coconut sugar in the bowl of your stand mixer. Stir in salt. Make a well in the centre. Add in milk, egg yolks, egg white and melted butter. Mix on the slow speed until the ingredients roughly come together. Increase the speed and knead for 5-8 minutes or until the dough is smooth and elastic.
- Turn out the dough and shape into a ball. Brush the mixing bowl with a little bit of olive oil to grease. Return the dough to the mixing bowl and cover with a damp tea towel. Set aside in a warm, draught-free place to prove for 45 - 60 minutes or until the dough has almost doubled in size.
- Punch down the centre of the dough with your fist. Knead for 2 minutes or until the dough is elastic and has returned to its original size.
- Roll out the dough into a square. Sprinkle with the chia seeds and chopped olives. Fold the dough in half to enclose the seeds and olives and knead until well combined.
- Divide the dough into 3 even pieces and round up. Cover and set aside for 10 minutes. Roll out each dough to about 15 x 25 cm rectangle with a rolling pin. Fold the dough towards the centre from left and right. Rotate the dough 90 degrees and roll it up. Place the seam side down into the prepared loaf pan. Repeat with the other two dough balls.
- Cover with a damp tea towel. Set aside in a warm, draught-free place to prove for 30 minutes or until the dough has almost doubled in size.
- Brush the top of the loaf with egg white and sprinkle with the chopped nuts. Bake for 25-30 minutes or until golden and the loaf sounds hollow when tapped on the base. Turn onto a wire rack to cool slightly. Serve at room temperature.

http://schneiderchen.de | © 2020 | http://angiesrecipes.blogspot.com

http://schneiderchen.de | © 2020 | http://angiesrecipes.blogspot.com

http://schneiderchen.de | © 2020 | http://angiesrecipes.blogspot.com

http://schneiderchen.de | © 2020 | http://angiesrecipes.blogspot.com
Peanut Butter Bacon Fat Spelt Cookies
 © 2020 | http://angiesrecipes.blogspot.com
 © 2020 | http://angiesrecipes.blogspot.com
 |
 |
 © 2020 | http://angiesrecipes.blogspot.com
Easy to make, free of dairy and refined sugars, deliciously crunchy and chewy spelt cookies with organic peanut butter and a secret ingredient - bacon fat. The mild sweetness comes from coconut sugar, but real cane sugar would be just as great in the recipe.
|

- Using a hand mixer, cream bacon fat, crunchy peanut butter and both sugars on medium speed until combined and smooth. Scrape down the sides and bottom of the bowl as needed. Add the eggs and vanilla extract, then beat on high speed until combined.
- Whisk together the spelt flour and baking soda together. Sift the flour mixture into the creamed mixture, then mix on low until combined.
- Cover the dough and chill for 30 minutes. Preheat oven to 180C/350F. Line 3 large baking sheets with parchment paper.
- Roll the cookie mixture into tablespoon size balls and then roll the balls in granulated raw sugar. Place them on the prepared cookie sheets. You don't need to press or flatten the cookie balls. They will spread while baking. Bake for 12-14 minutes.
- Remove from the oven. Cool cookies on the baking sheets for 5 minutes before transferring to a wire rack to cool completely.

http://schneiderchen.de | © 2020 | http://angiesrecipes.blogspot.com
 |
 |

http://schneiderchen.de | © 2020 | http://angiesrecipes.blogspot.com

http://schneiderchen.de | © 2020 | http://angiesrecipes.blogspot.com


